Enable service monitoring
To enable monitoring for this service, you first need to set up integration with Azure Monitor.
Add the service to monitoring
In order to view the service metrics, you must add the service to monitoring in your Dynatrace environment.
- Go to Settings > Cloud and virtualization > Azure.
- On the Azure overview page, select Edit for the desired Azure instance.
- Go to Services > Add service, choose the desired service name from the list, and select Add service.
- Select Save changes to save your configuration.
Monitor resources based on tags
You can choose to monitor resources based on existing Azure tags, as Dynatrace automatically imports them from service instances.
To monitor resources based on tags
-
Go to Settings > Cloud and virtualization > Azure.
-
On the Azure overview page, select the bearbeiten
 icon for the Azure instance.
 -
Set Resources to be monitored to Monitor resources selected by tags.
-
Enter key/value pairs to identify resources to exclude from monitoring or include in monitoring. You can enter multiple key/value pairs: each time you enter a pair, another empty row is displayed for you to edit as needed.
-
Select Save to save your configuration.
To import the Azure tags automatically into Dynatrace, turn on Capture Azure tags automatically.
Configure service metrics
Once you add a service, Dynatrace starts automatically collecting a suite of metrics for this particular service. These are recommended metrics.
Recommended metrics:
- Are enabled by default
- Can't be disabled
- Can have recommended dimensions (enabled by default, can't be disabled)
- Can have optional dimensions (disabled by default, can be enabled).
Apart from the recommended metrics, most services have the possibility of enabling optional metrics.
Optional metrics:
- Can be added and configured manually
- Go to Settings > Cloud and virtualization > Azure.
- On the Azure overview page, scroll down and select Edit for the desired Azure instance.
- Go to Services and select Manage services.
- To add a metric, select the service for which you want to add metrics.
- Select Add new metric.
- From the menu, select the metric you want.
- Select Add metric to add the metric to monitoring.
- To configure a metric, select Edit.
- Select Apply to save your configuration.
View service metrics
You can view the service metrics in your Dynatrace environment either on the custom device overview page or on your Dashboards page.
View metrics on the custom device overview page
To access the custom device overview page
- Go to Technologies & Processes or Technologies & Processes Classic (latest Dynatrace).
- Filter by service name and select the relevant custom device group.
- Once you select the custom device group, you're on the custom device group overview page.
- The custom device group overview page lists all instances (custom devices) belonging to the group. Select an instance to view the custom device overview page.
View metrics on your dashboard
Once you add a service to monitoring, a preset dashboard for the respective service containing all recommended metrics is automatically created on your Dashboards page. You can look for specific dashboards by filtering by Preset and then by Name.
For existing monitored services, you might need to resave your credentials for the preset dashboard to appear on the Dashboards page. To resave your credentials, go to Settings > Cloud and virtualization > Azure, select the desired Azure instance, then select Save.
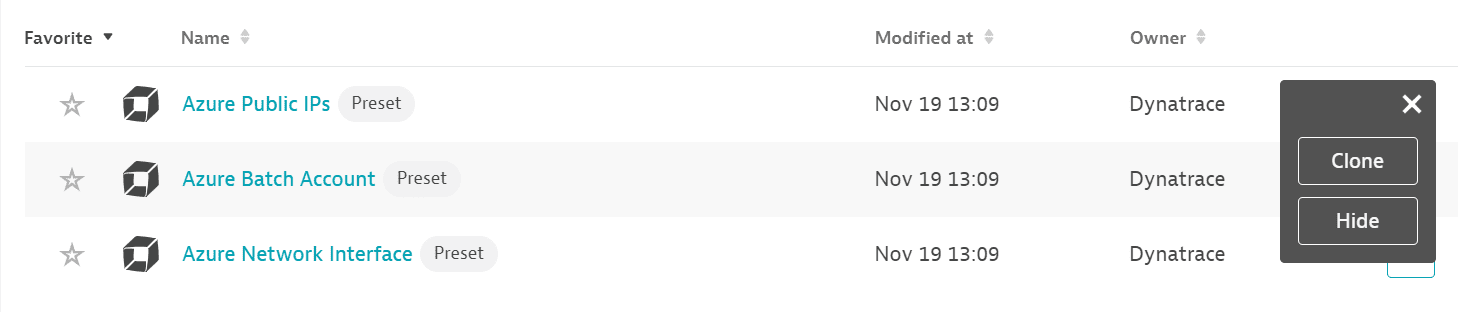
You can't make changes on a preset dashboard directly, but you can clone and edit it. To clone a dashboard, open the browse menu (…) and select Clone.
To remove a dashboard from the dashboards list, you can hide it. To hide a dashboard, open the browse menu (…) and select Hide.
Hiding a dashboard doesn't affect other users.