Disney/Pixar Bao Cake Pops
Disney/Pixar are known for their animated shorts, and they’re always filled with emotions that bring on tears in the best possible way. The most recent short film Bao, was no exception.
A story of food and family, the short hit very close to home for me. The shared love of tradition and the difficulty of letting go of little ones was handled in a funny and honest way.
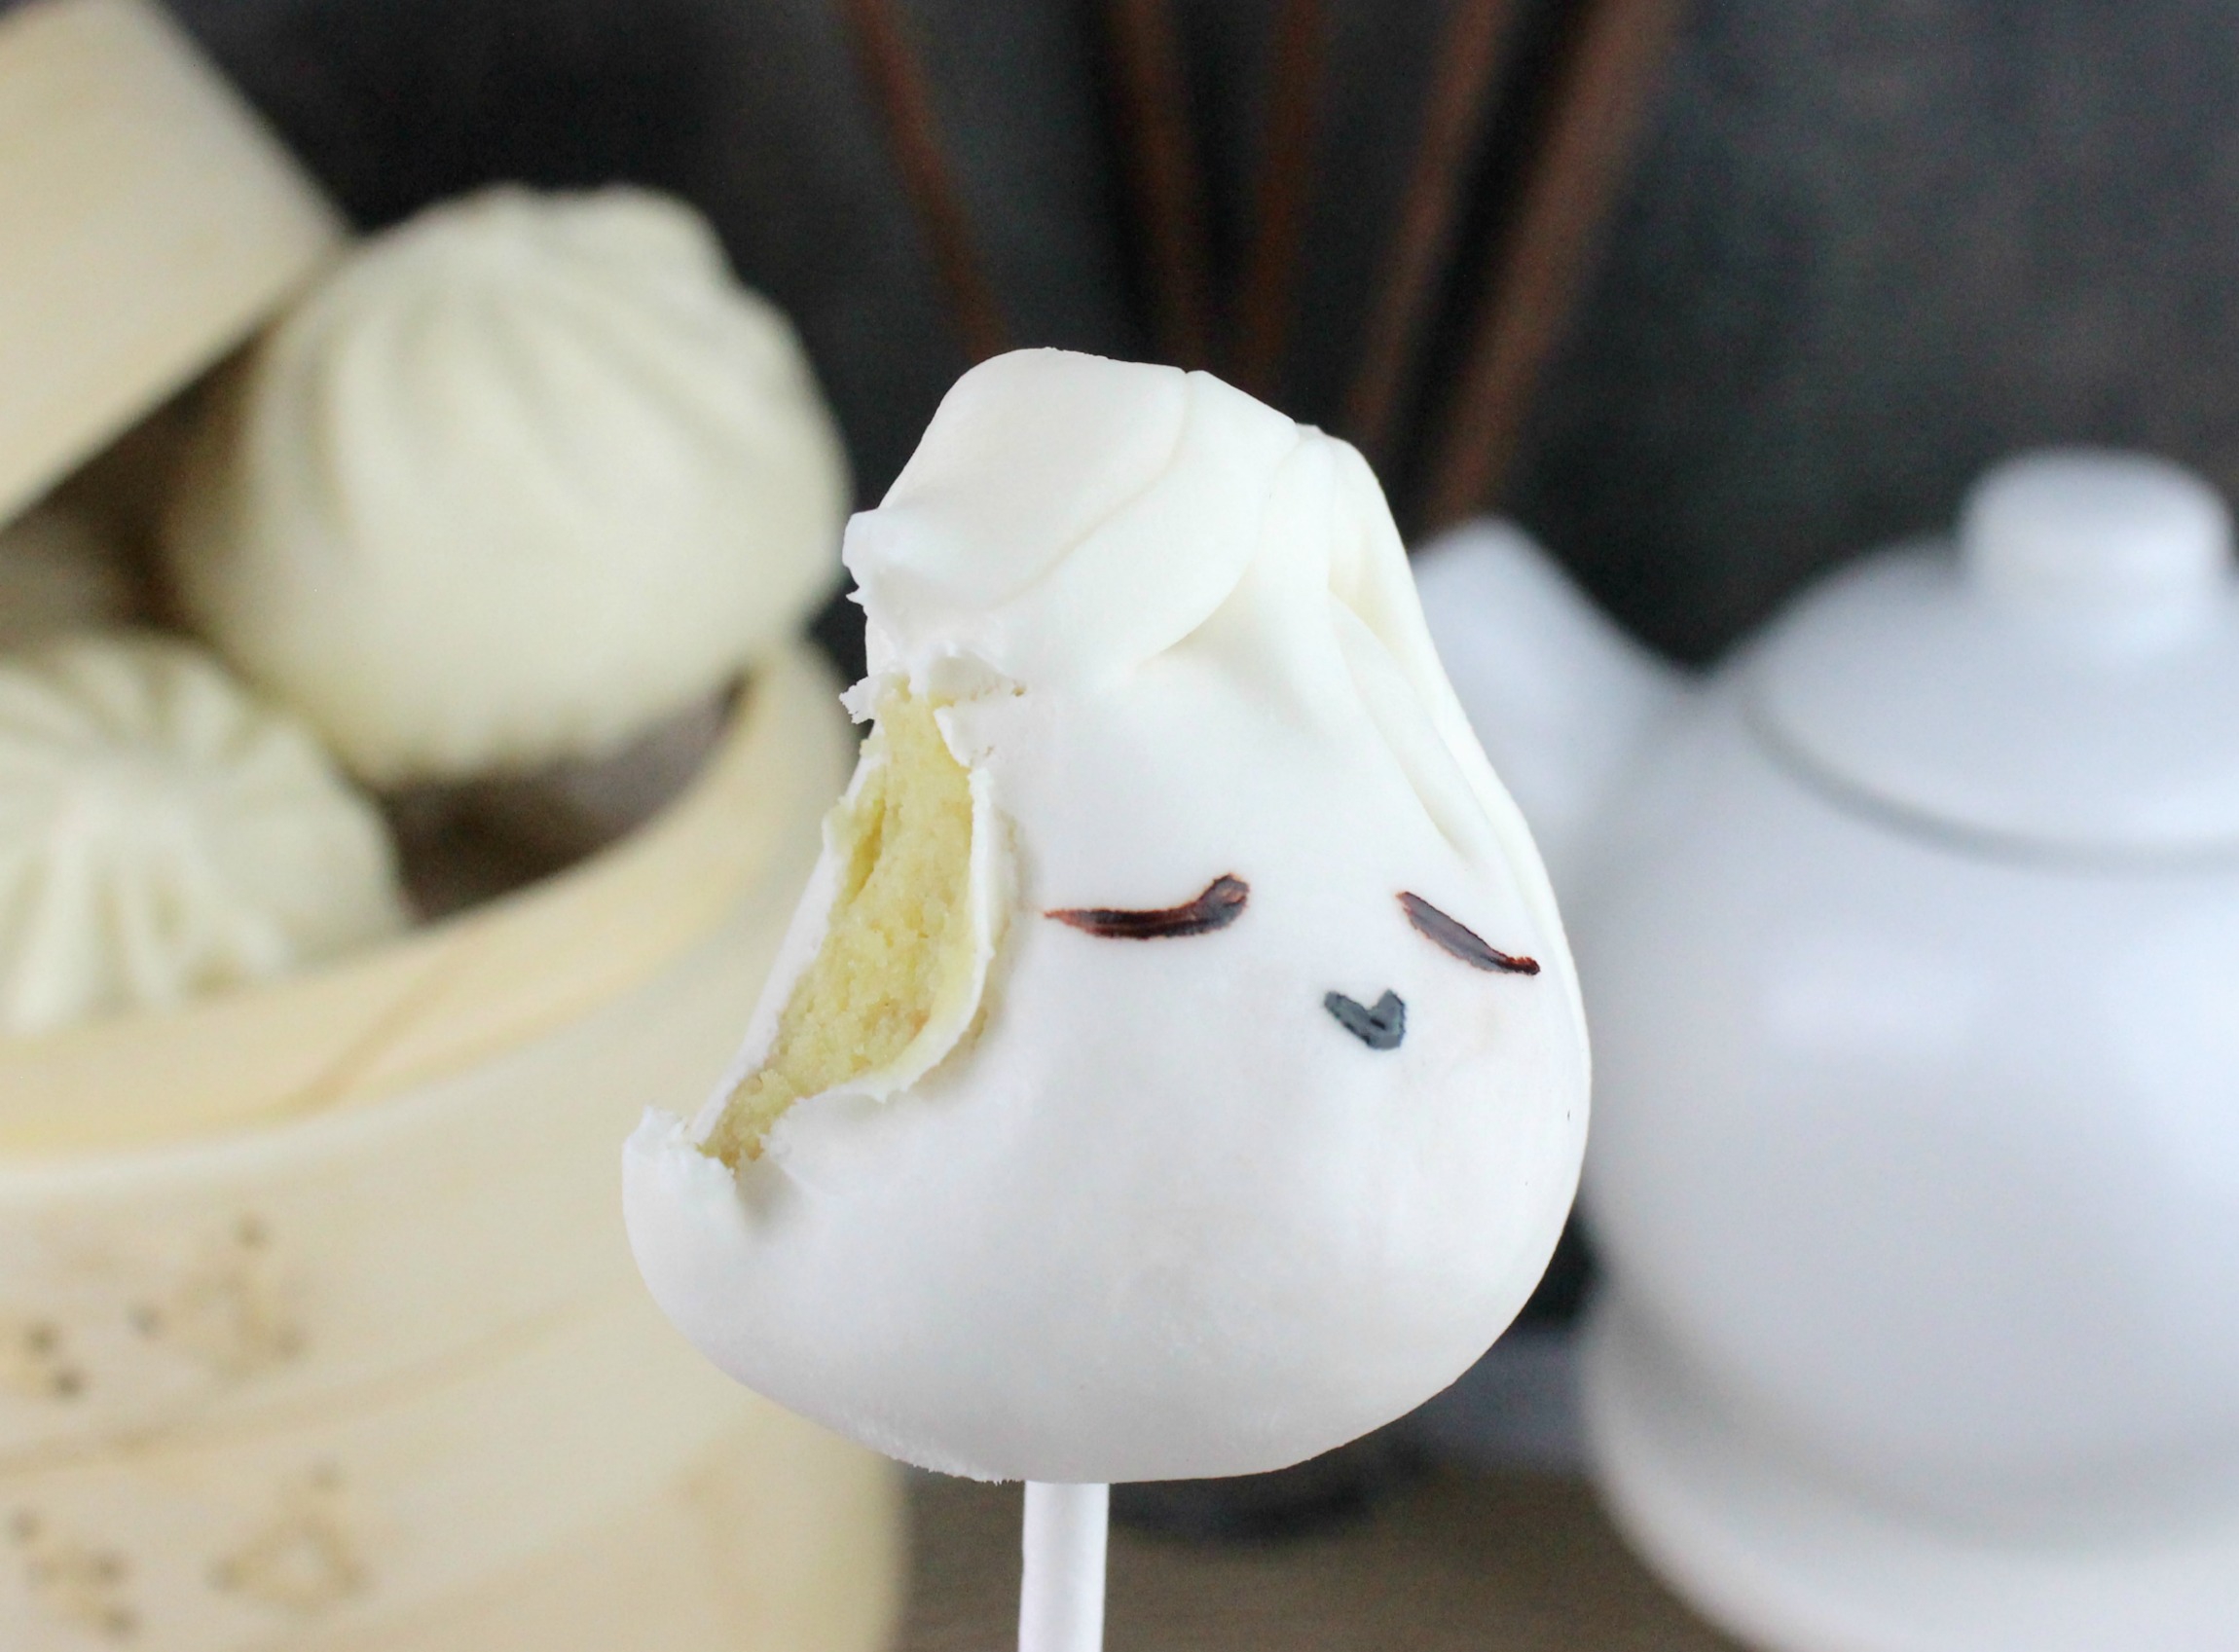
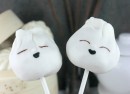
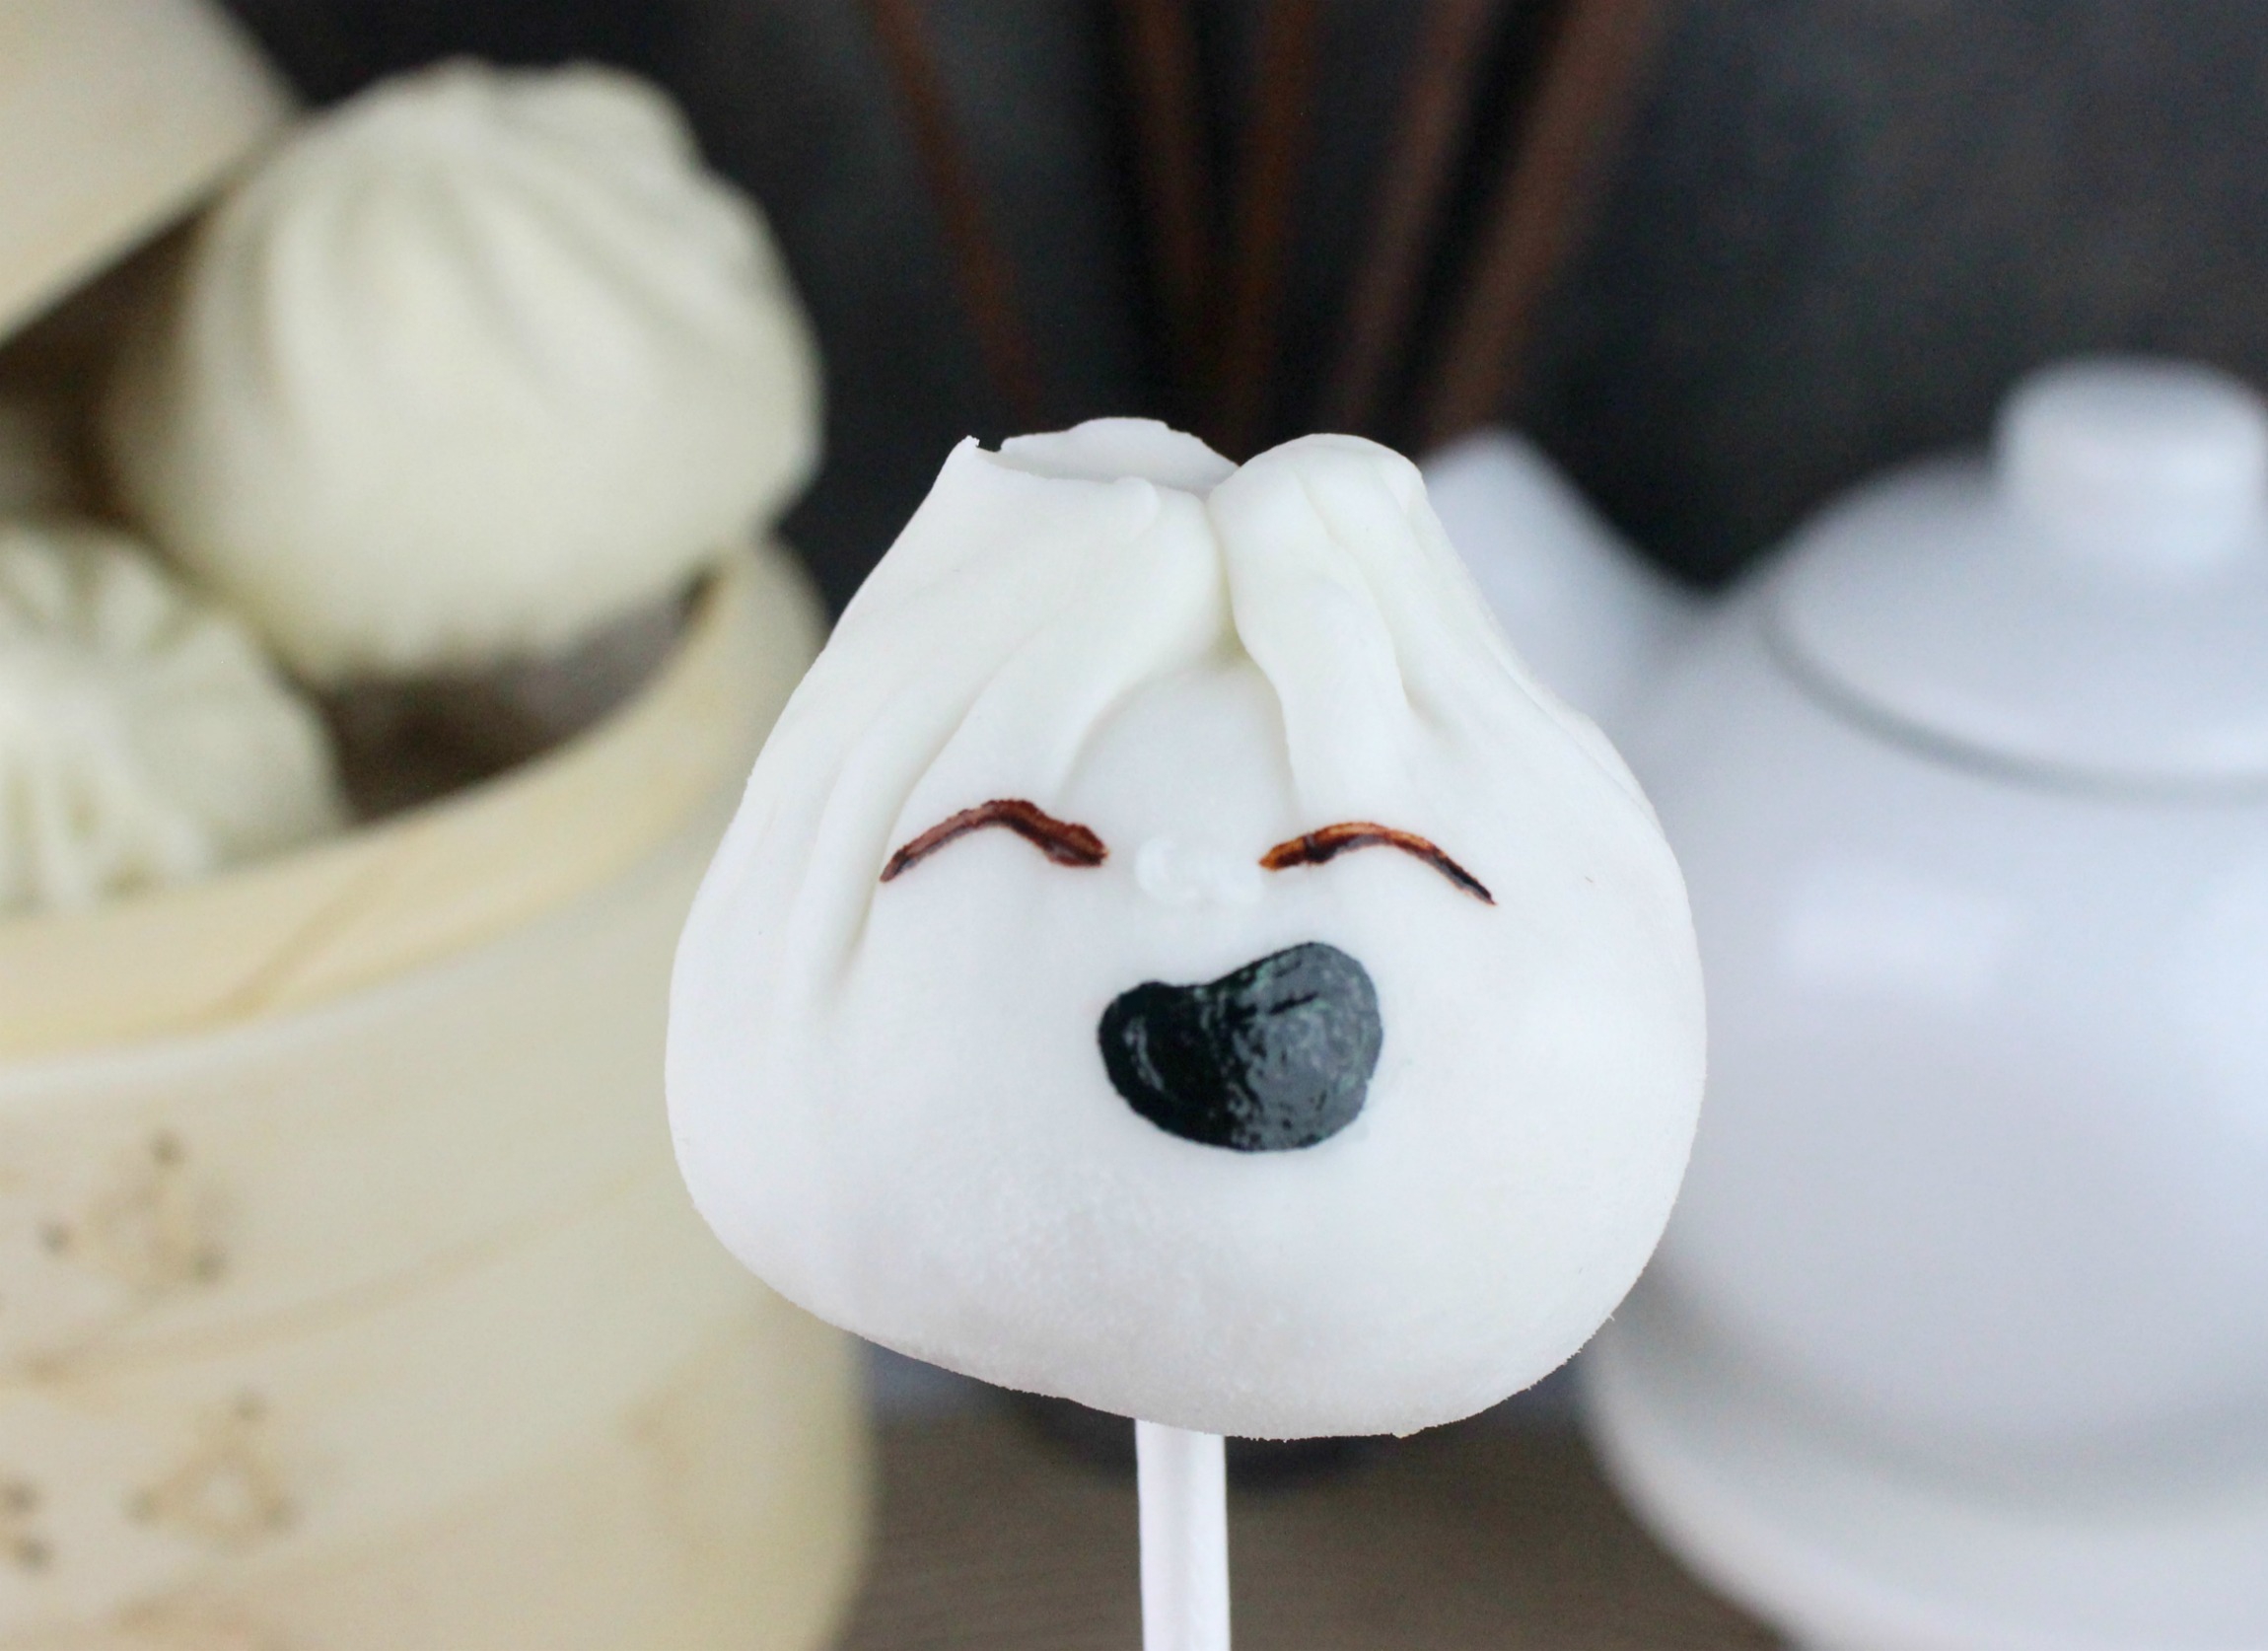
If you’re looking for a sweet version of baby baos, this is the recipe for you. Stuffed with balls of cake and wrapped just like a traditional bao, these cake pops are sure to delight. You’ll want to gobble one up so that you can keep it close to you forever.

Get the recipe below and check out Bao before Incredibles 2 on DVD, Blu-ray, and Digital HD, out now! Bao is also included in Pixar Shorts, Volume 3, available on November 13 on Blu-ray and DVD.


This post is sponsored by Disney/Pixar. Opinions expressed are my own.

Disney/Pixar Bao Cake Pops
Ingredients:
You’ll need:
White fondant
Lollipop sticks
2 ounces white candy melts
Brown food gel dye
Black food gel dye
White icing
Cake Pop ingredients:
4 cups crumbled cake
1/2 cup frosting, more as needed
Instructions:
Step 1: Prep a baking sheet with parchment.
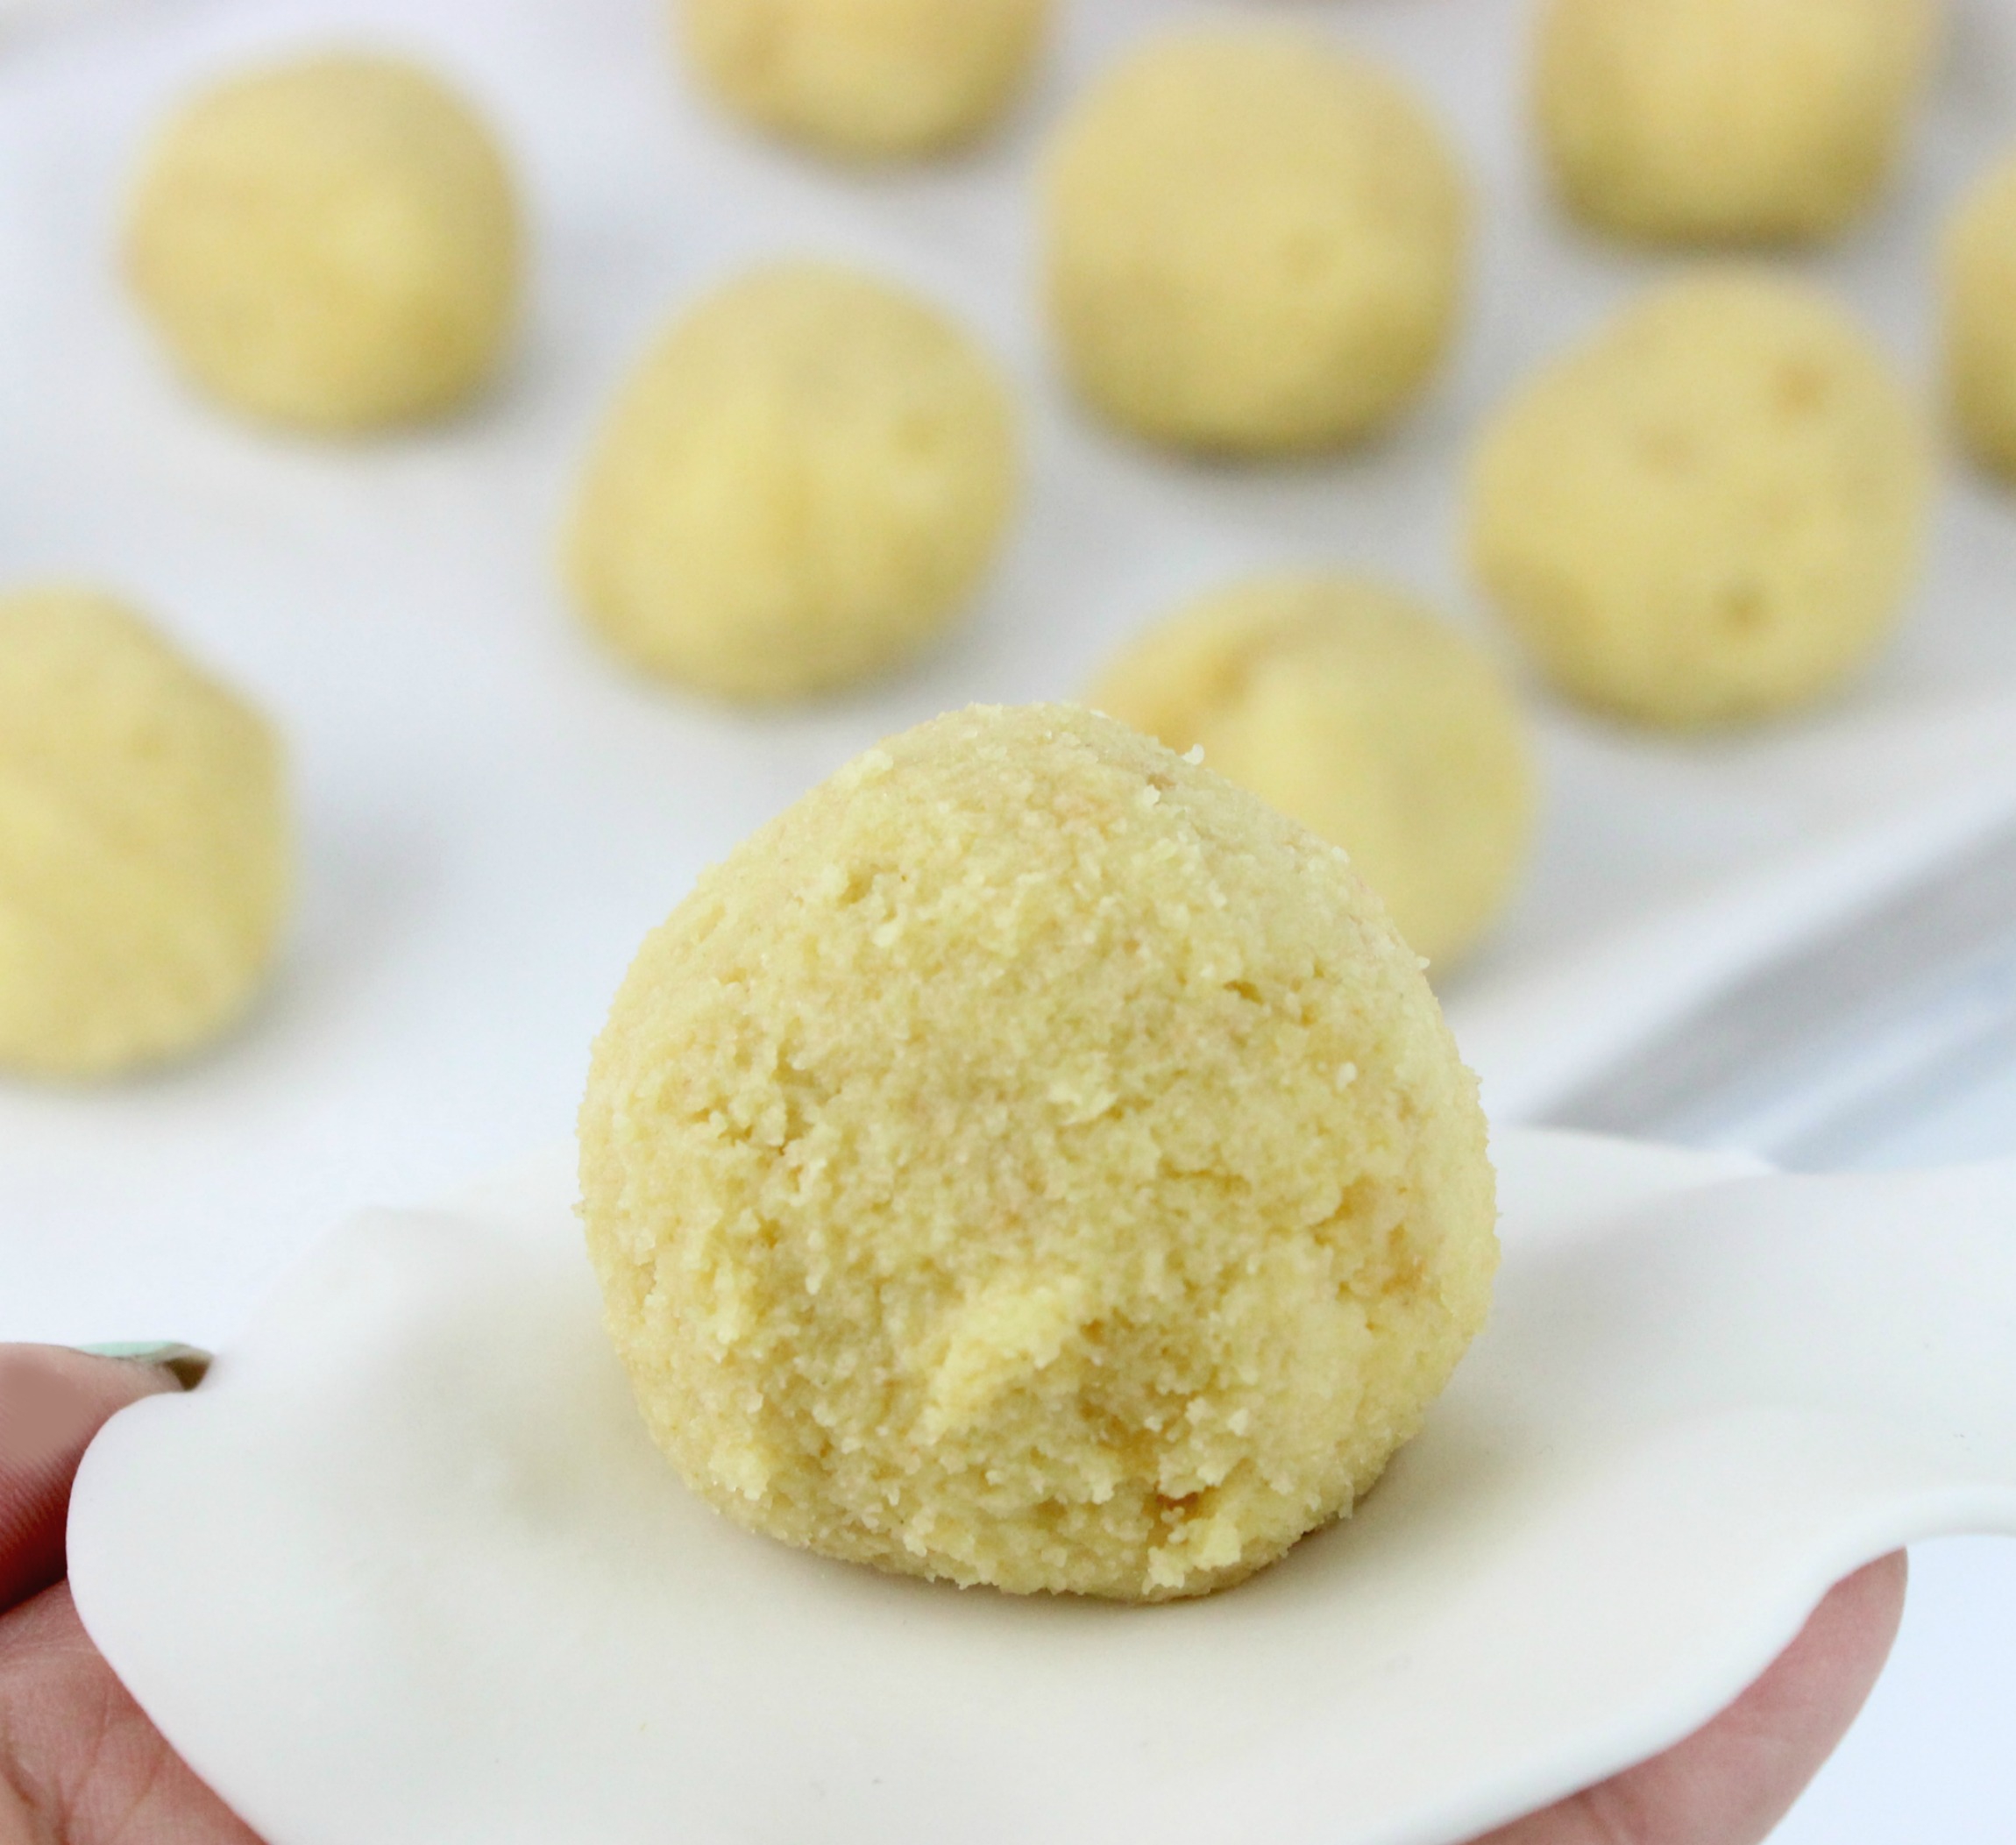
Step 2: Stir together the crumbled cake and frosting until well combined. Add more frosting if needed.

Step 3: Use a 1-1/2-inch scoop to create balls, then place them on the prepped baking sheet. Chill in the fridge for 15 minutes.
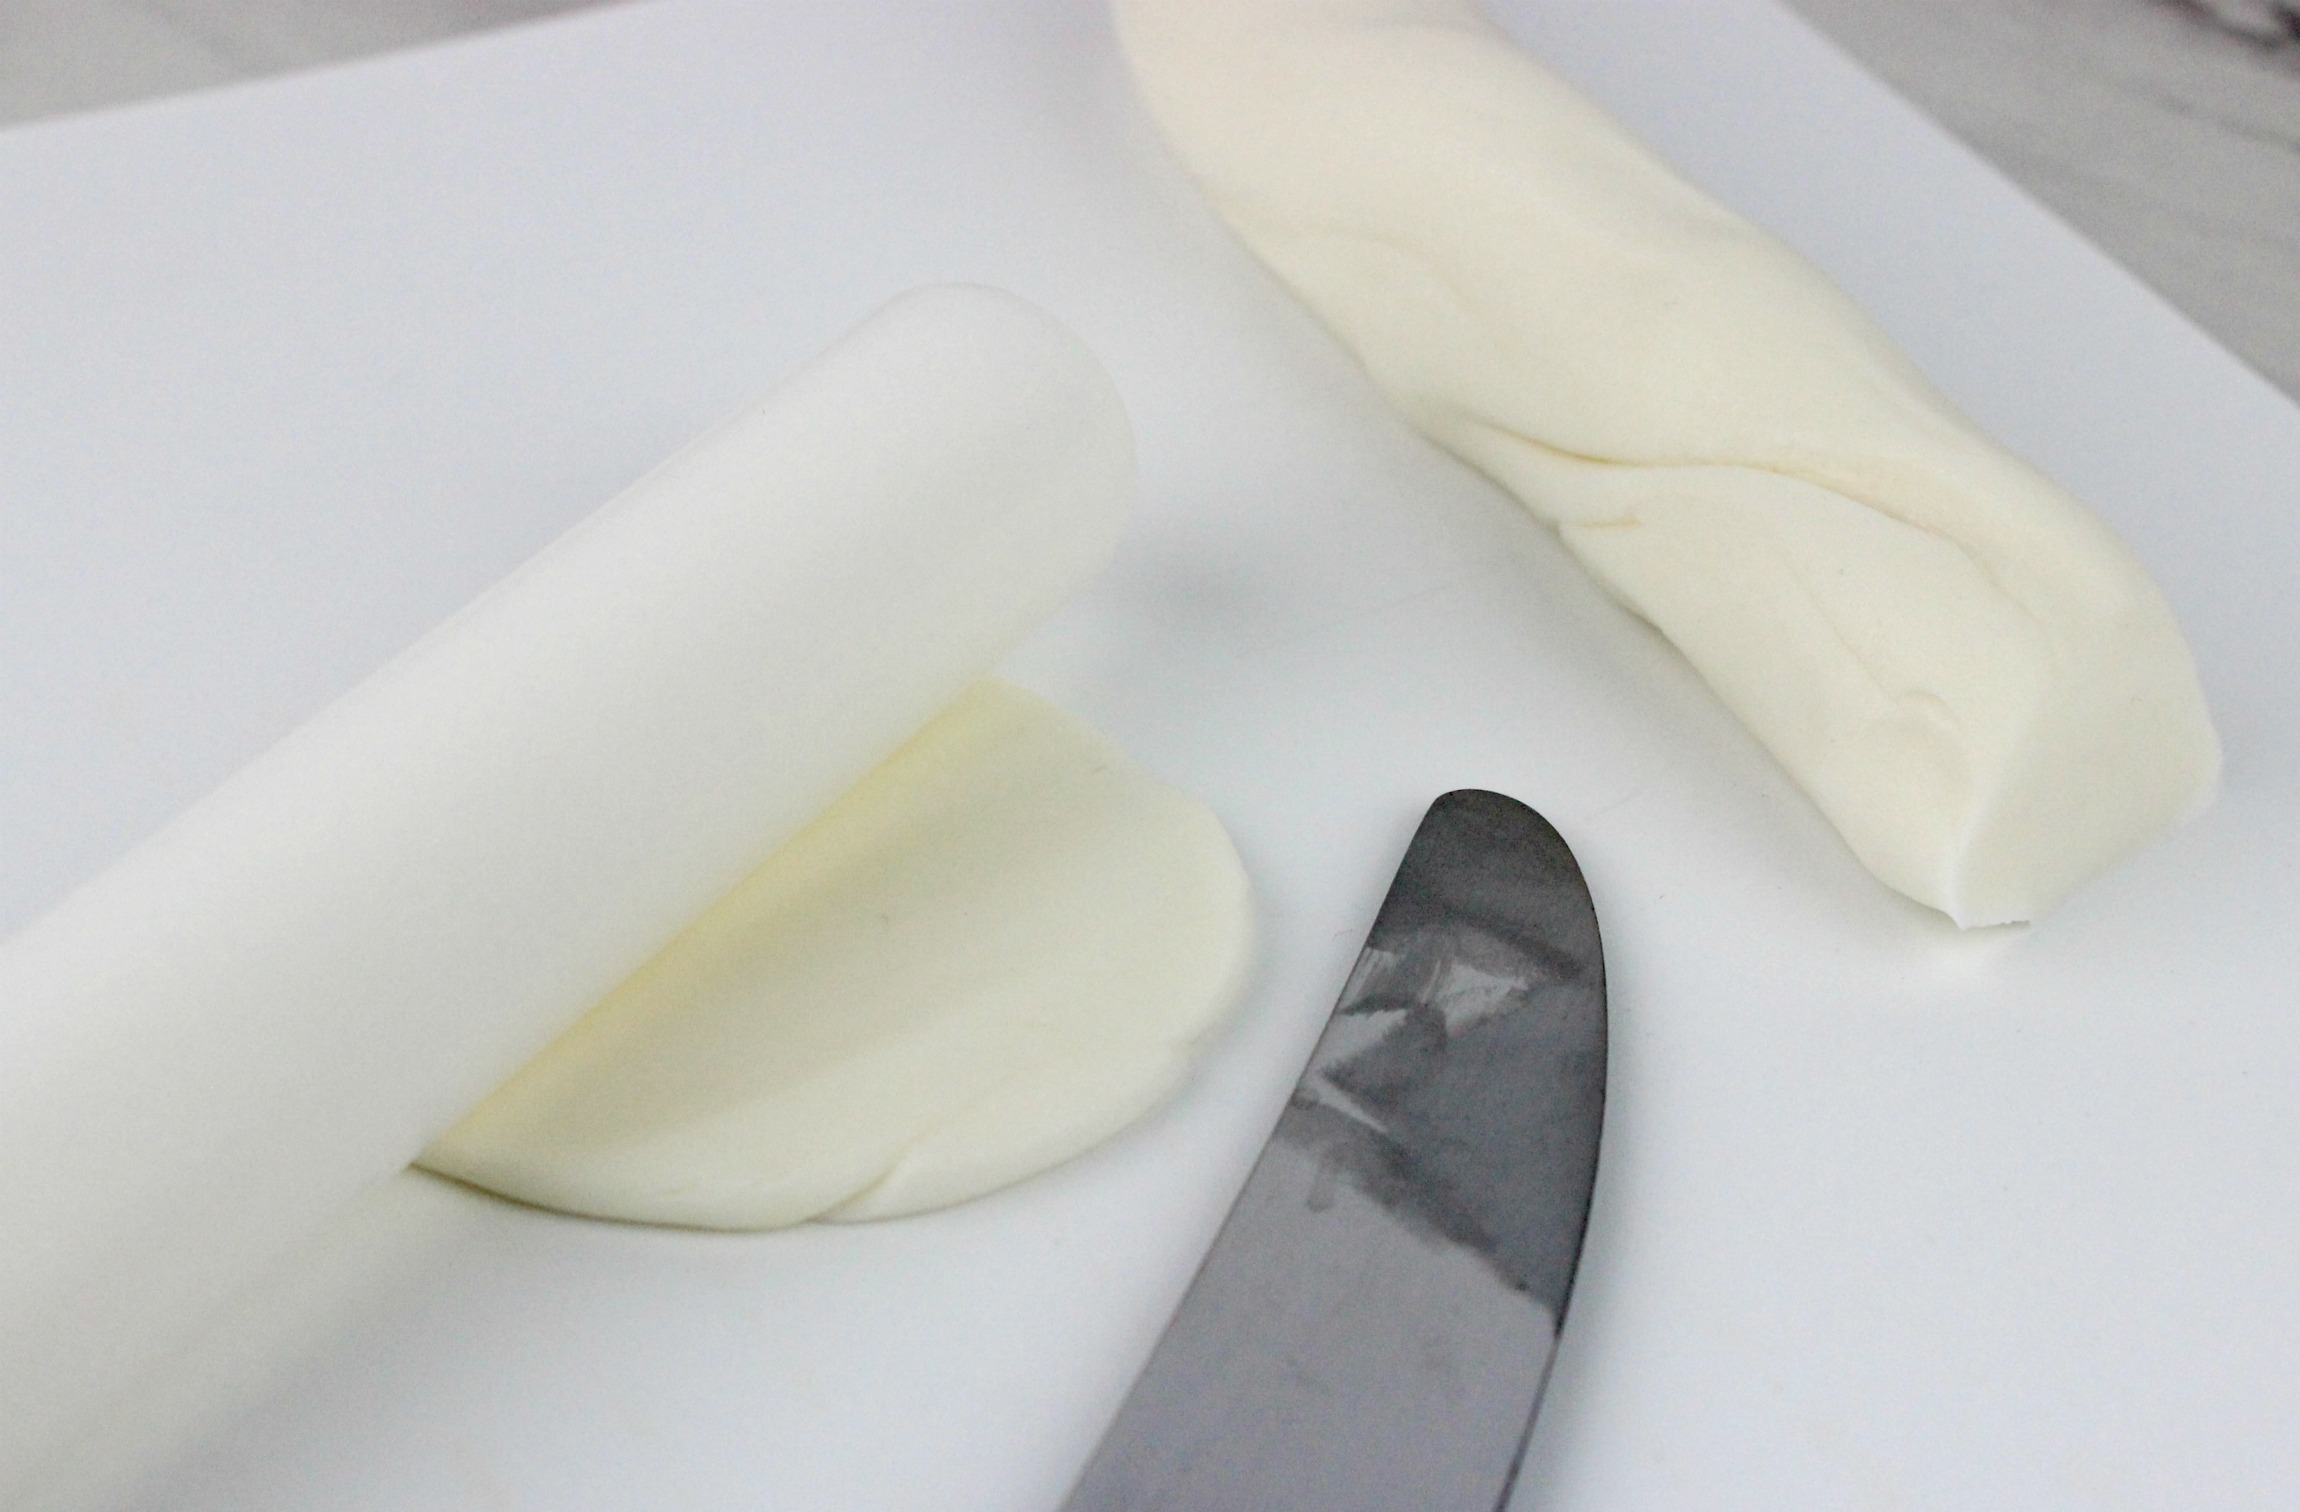
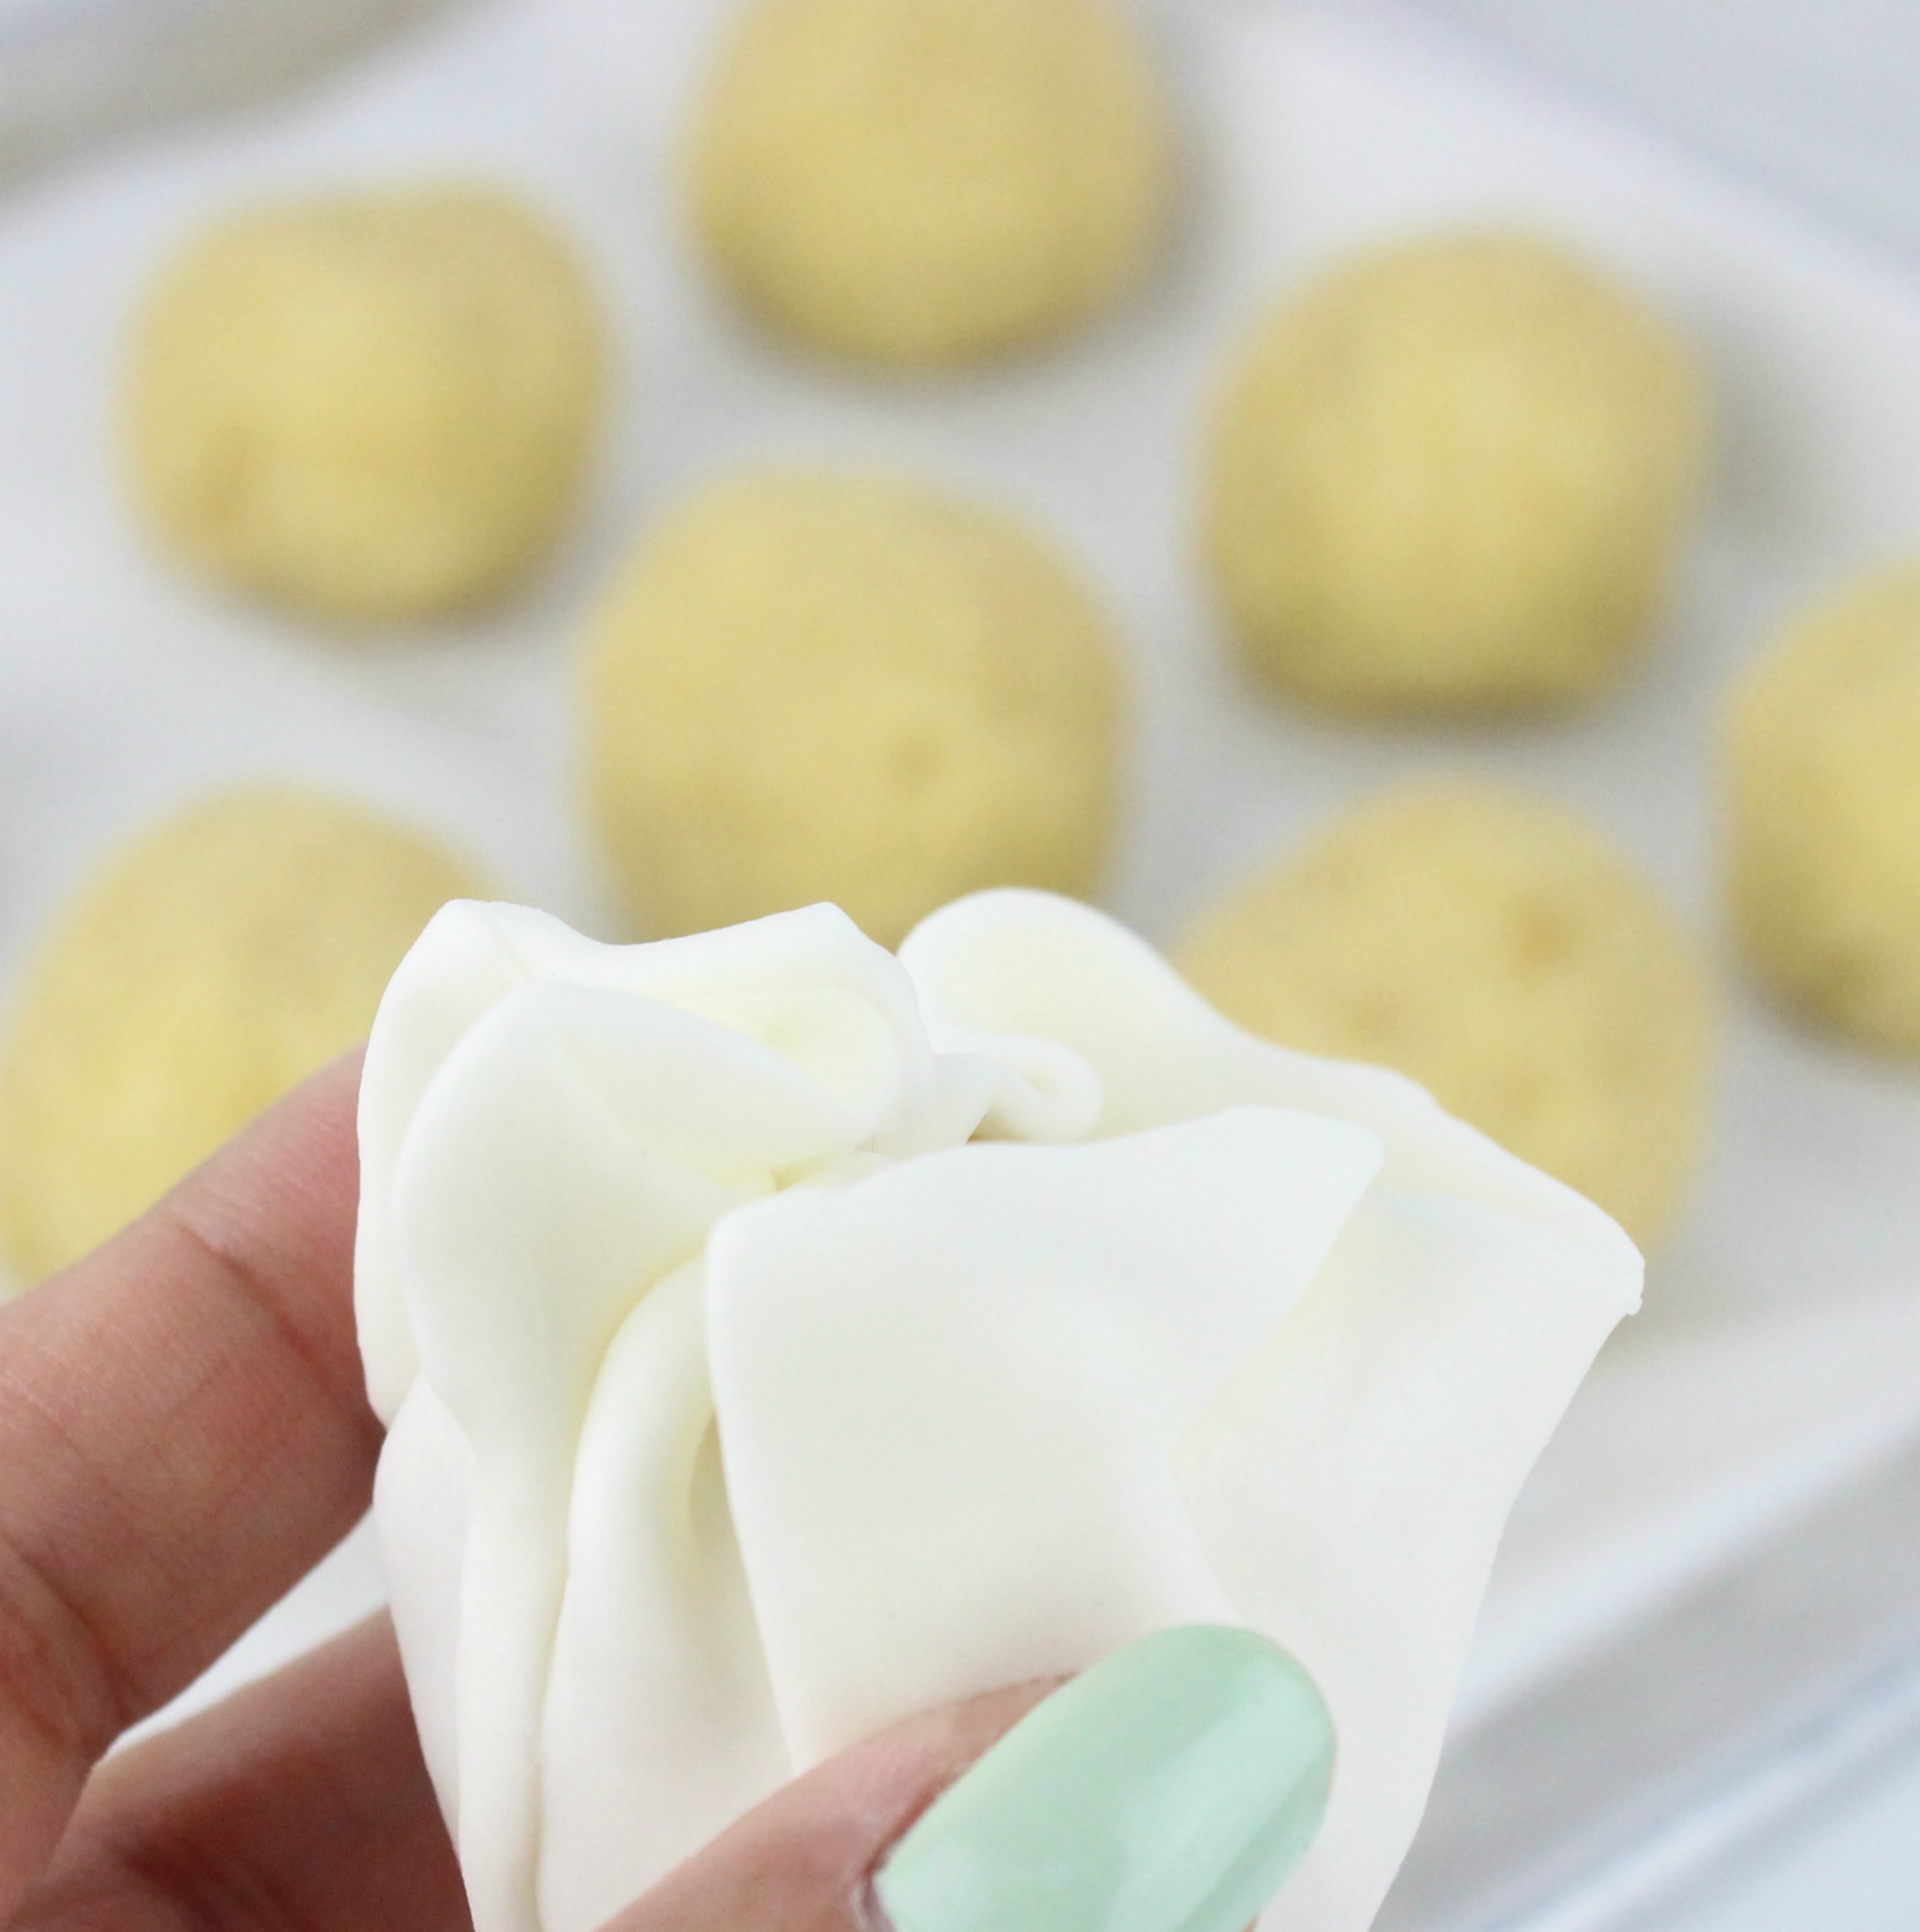
Step 4: Roll out a small pieces of fondant into a 3-inch circle. Wrap the cake ball as you would a real bao, pinching and folding, then twisting at the top to finish.
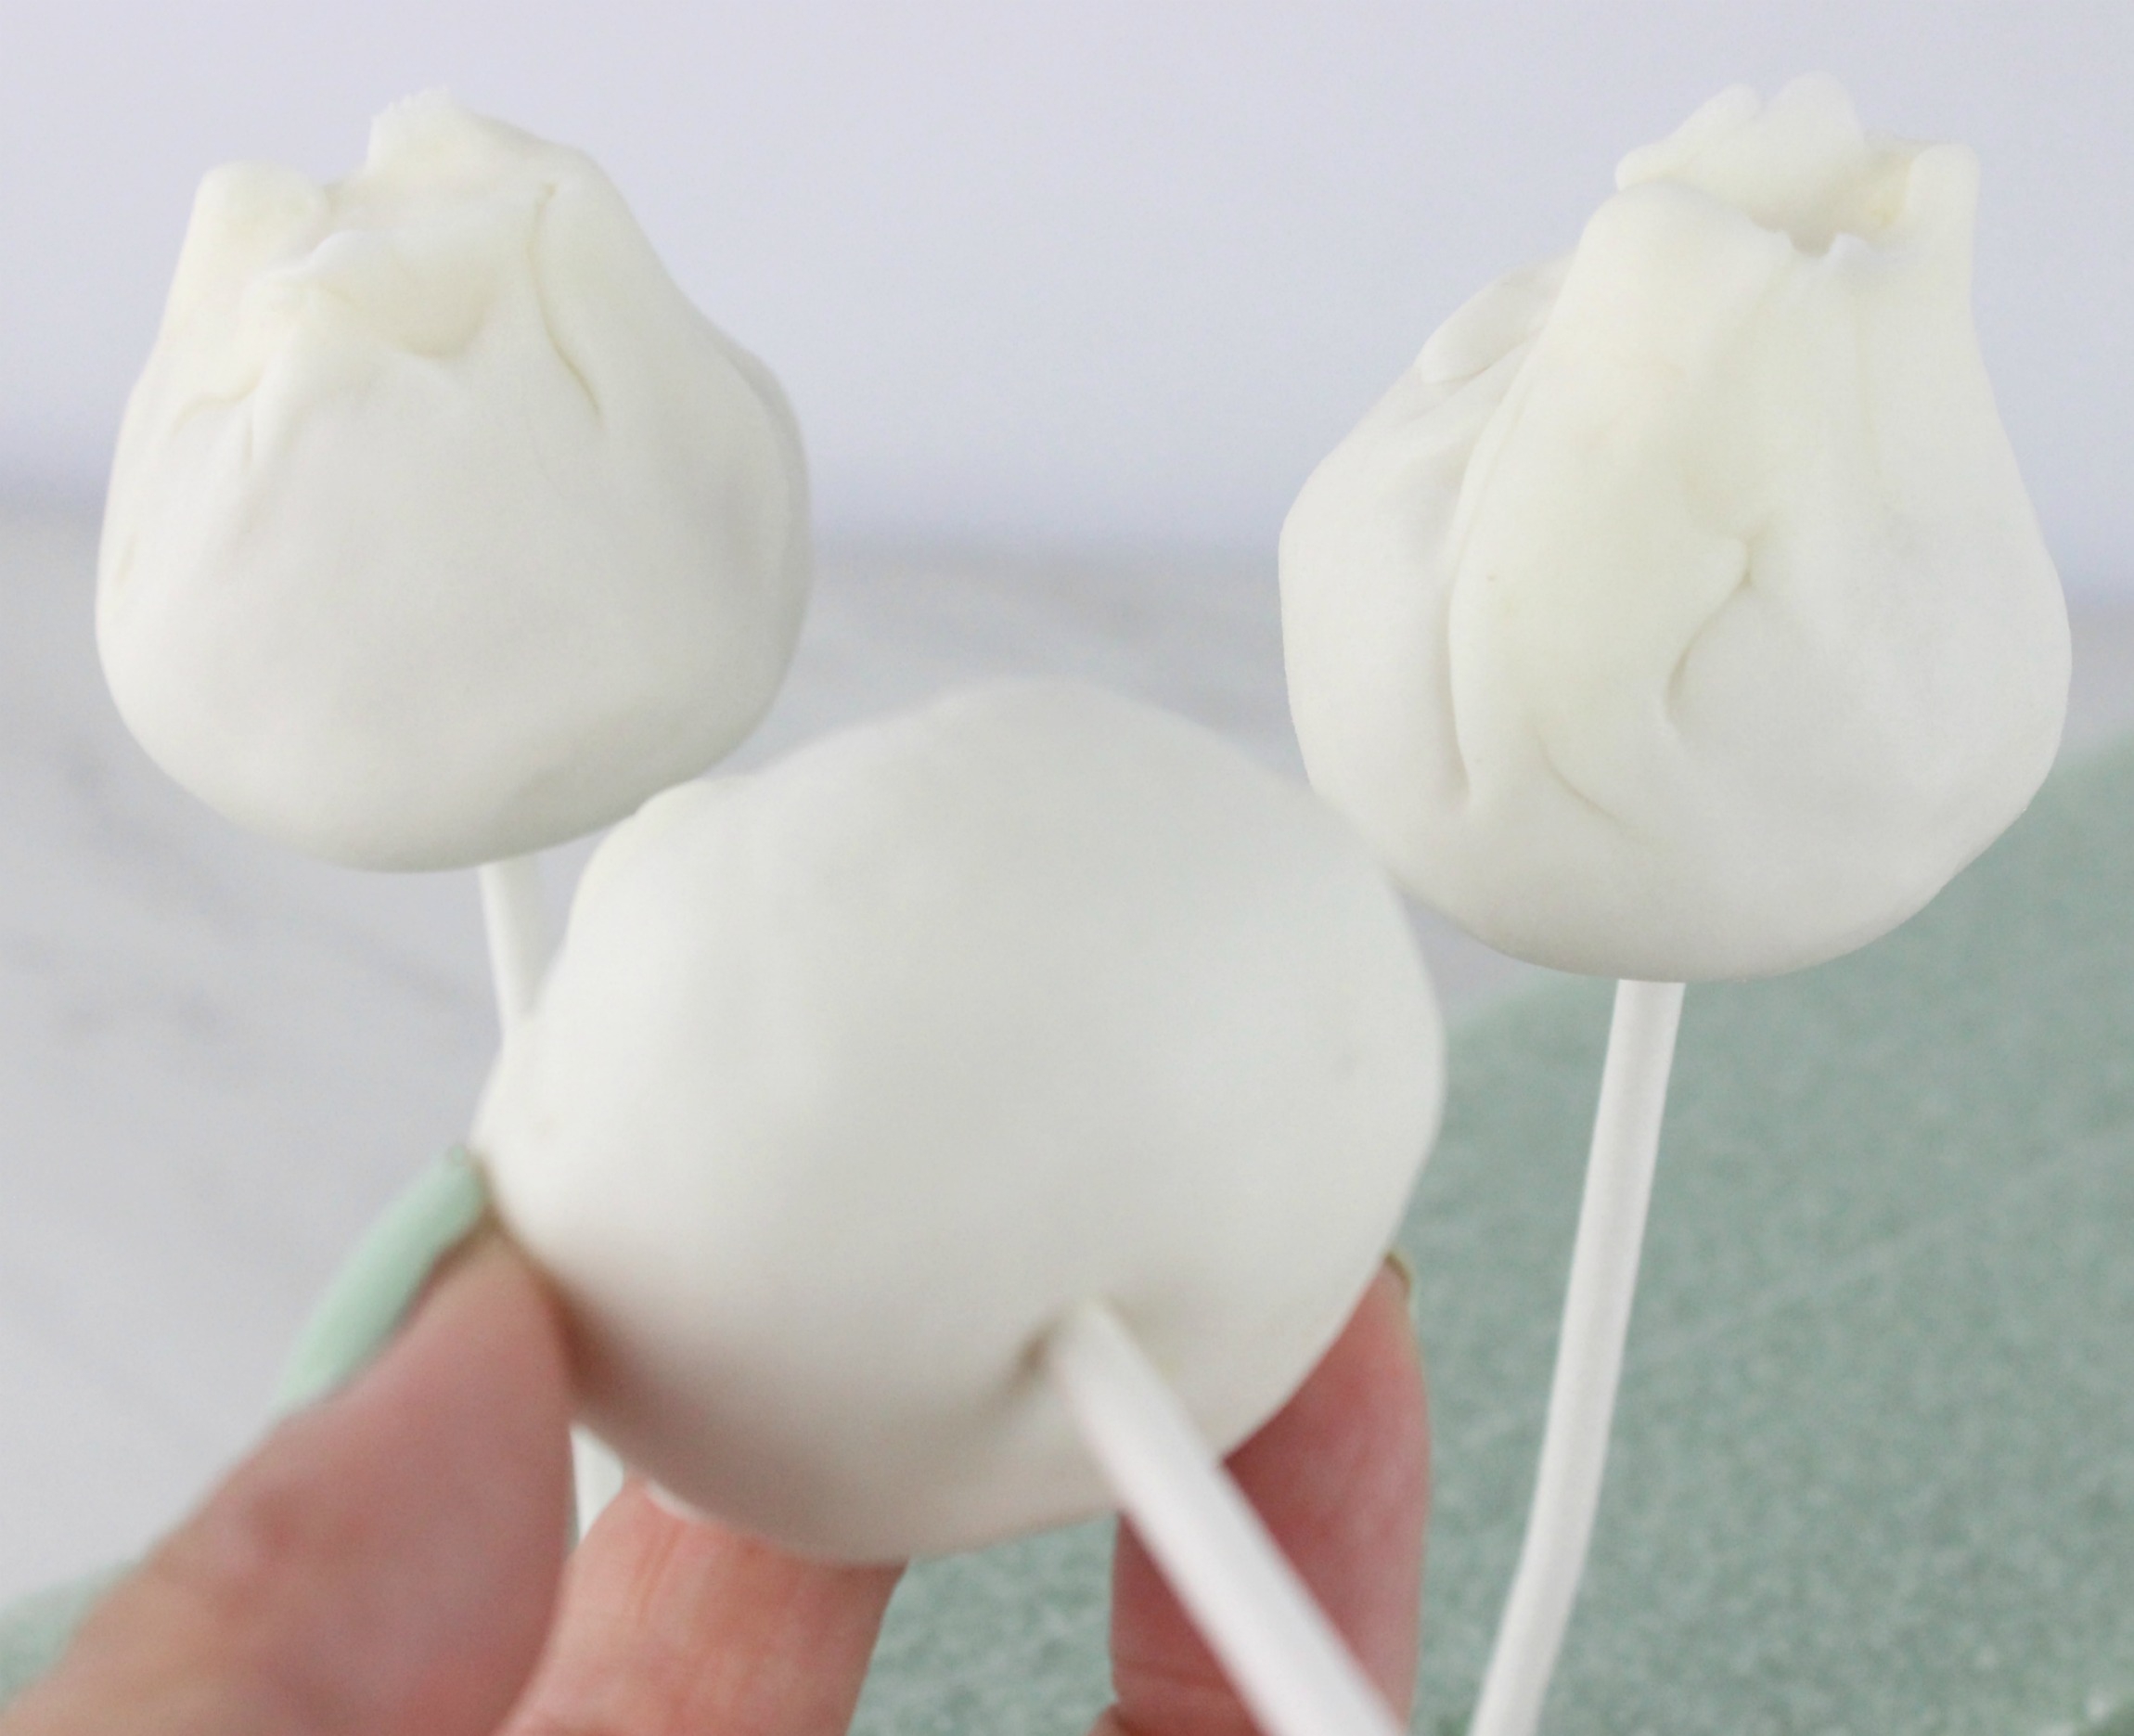
Step 5: Place the candy melts in a heat-safe bowl and microwave at 15-20 second intervals until melted. Dip the end of the lollipop stick into the melted chocolate, then carefully insert into the bottom of the bao. Stand them in a styrofoam block.
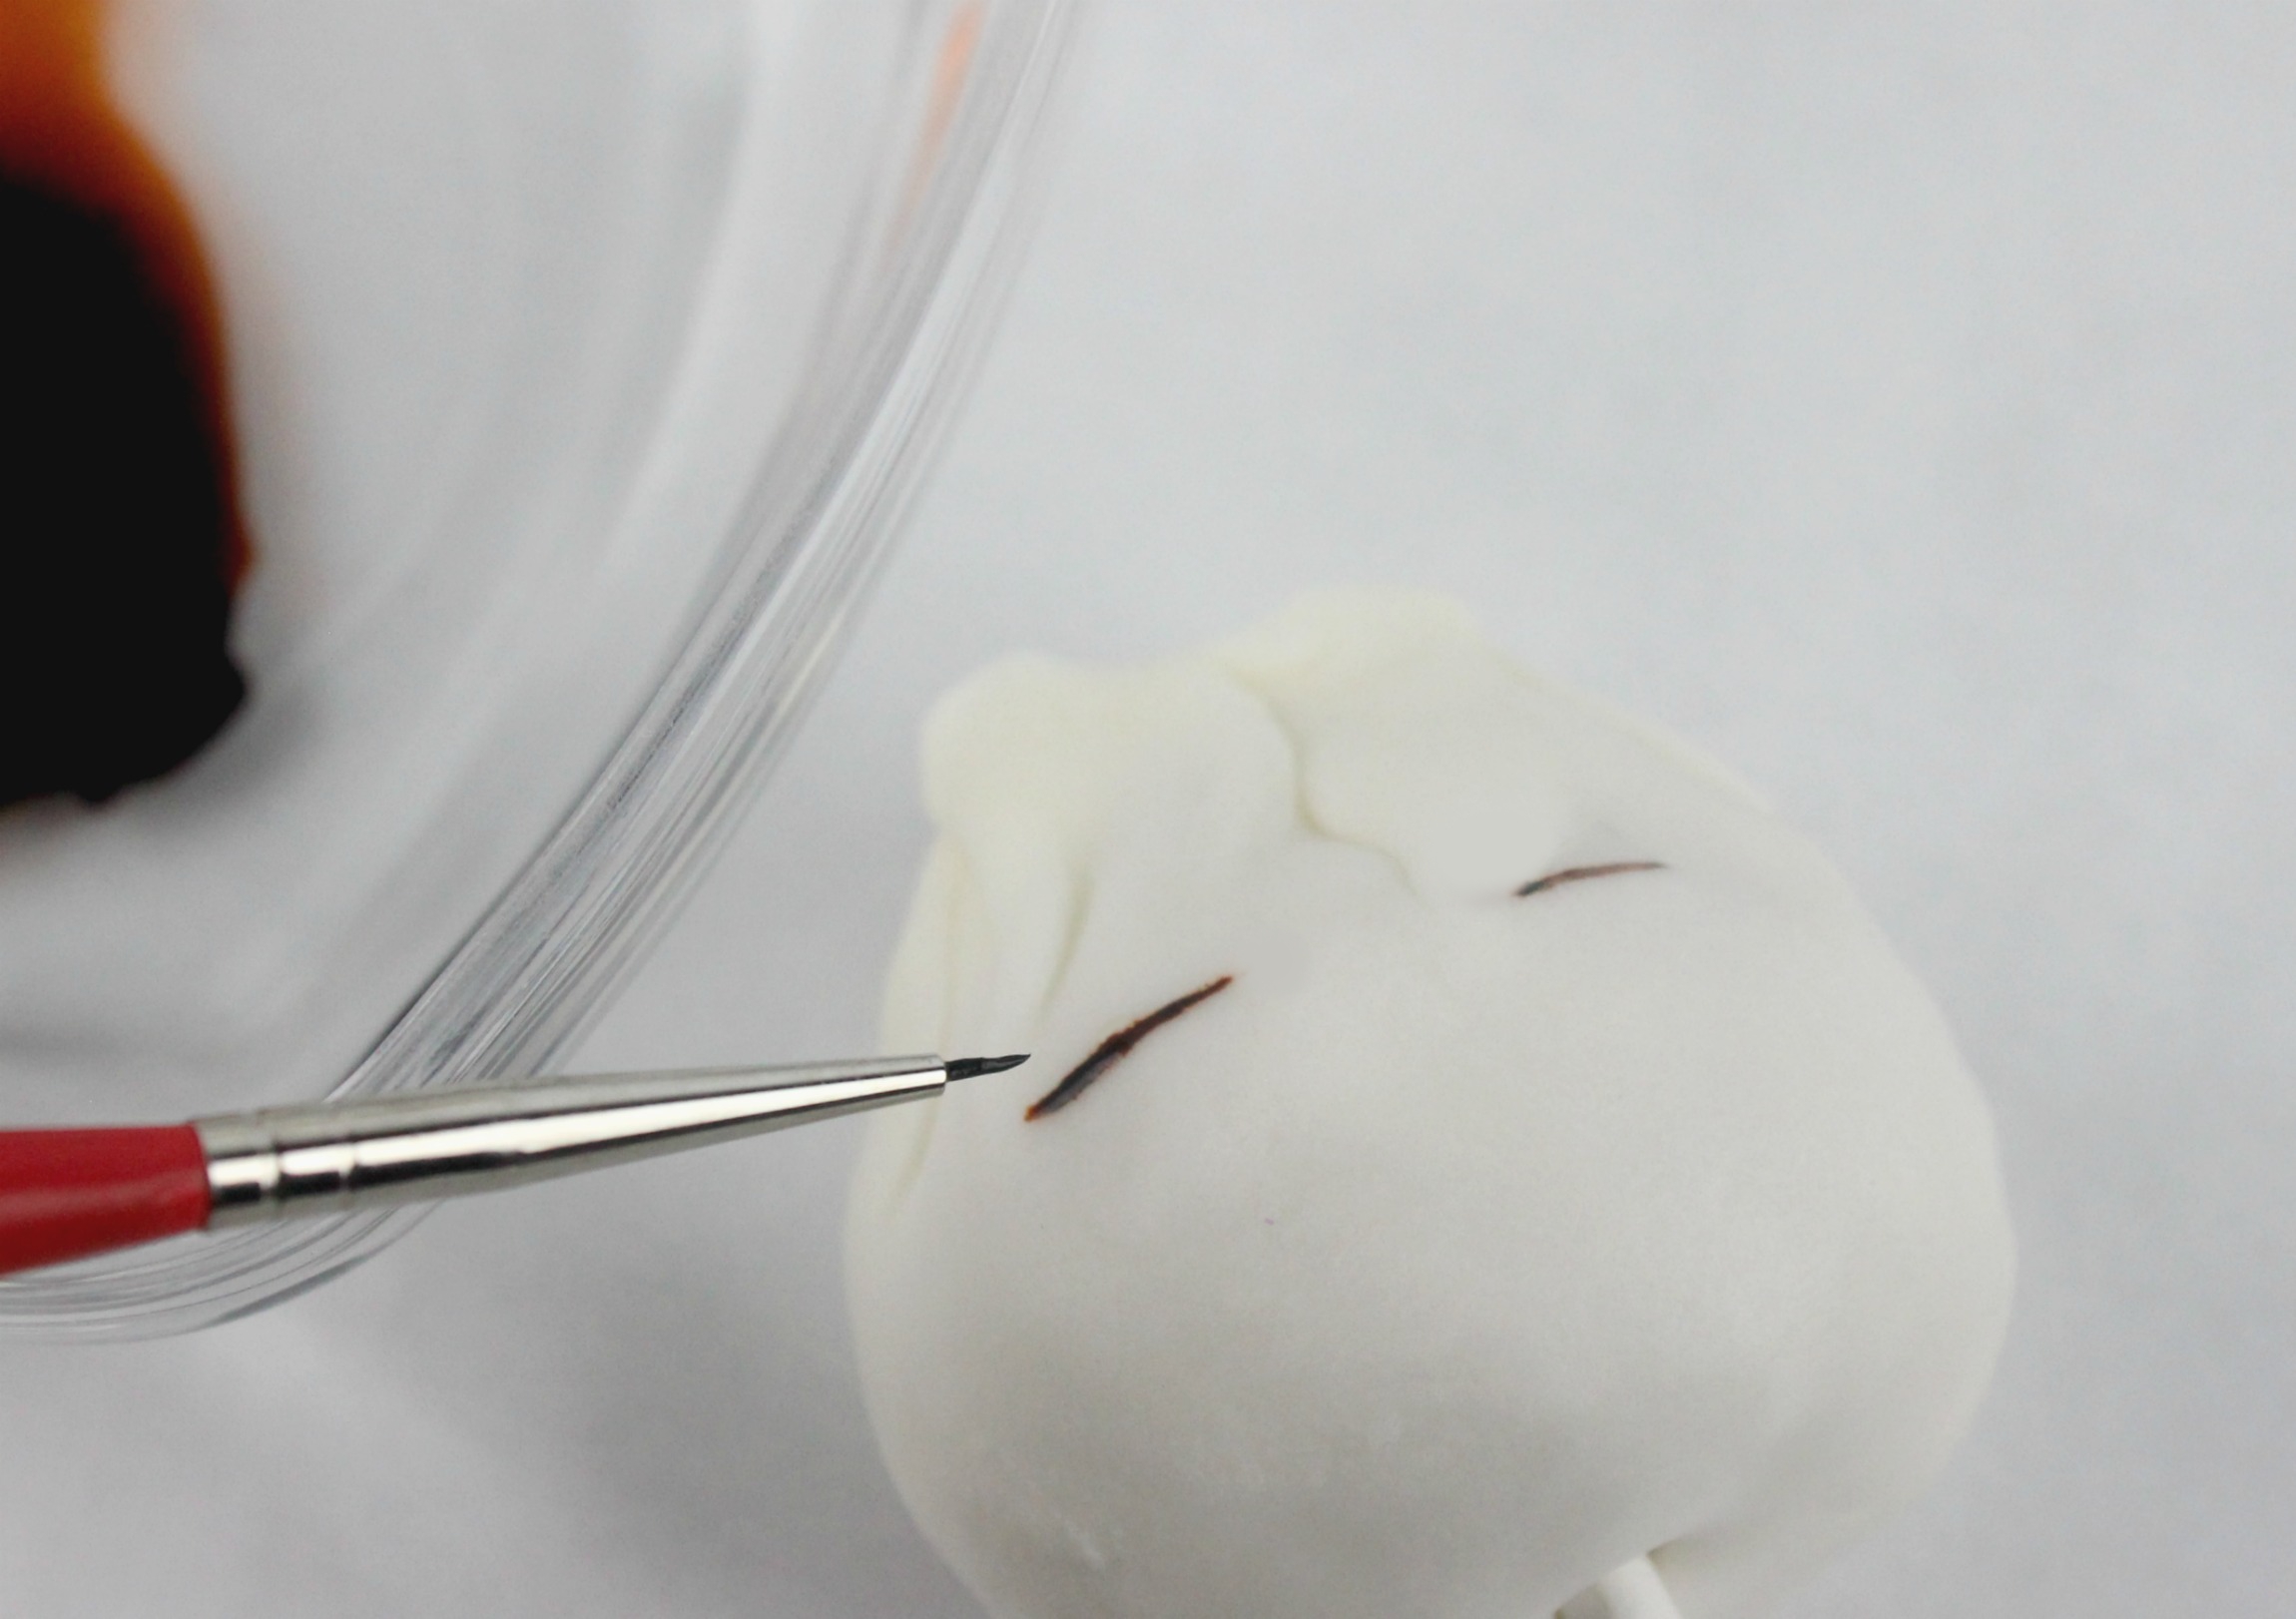
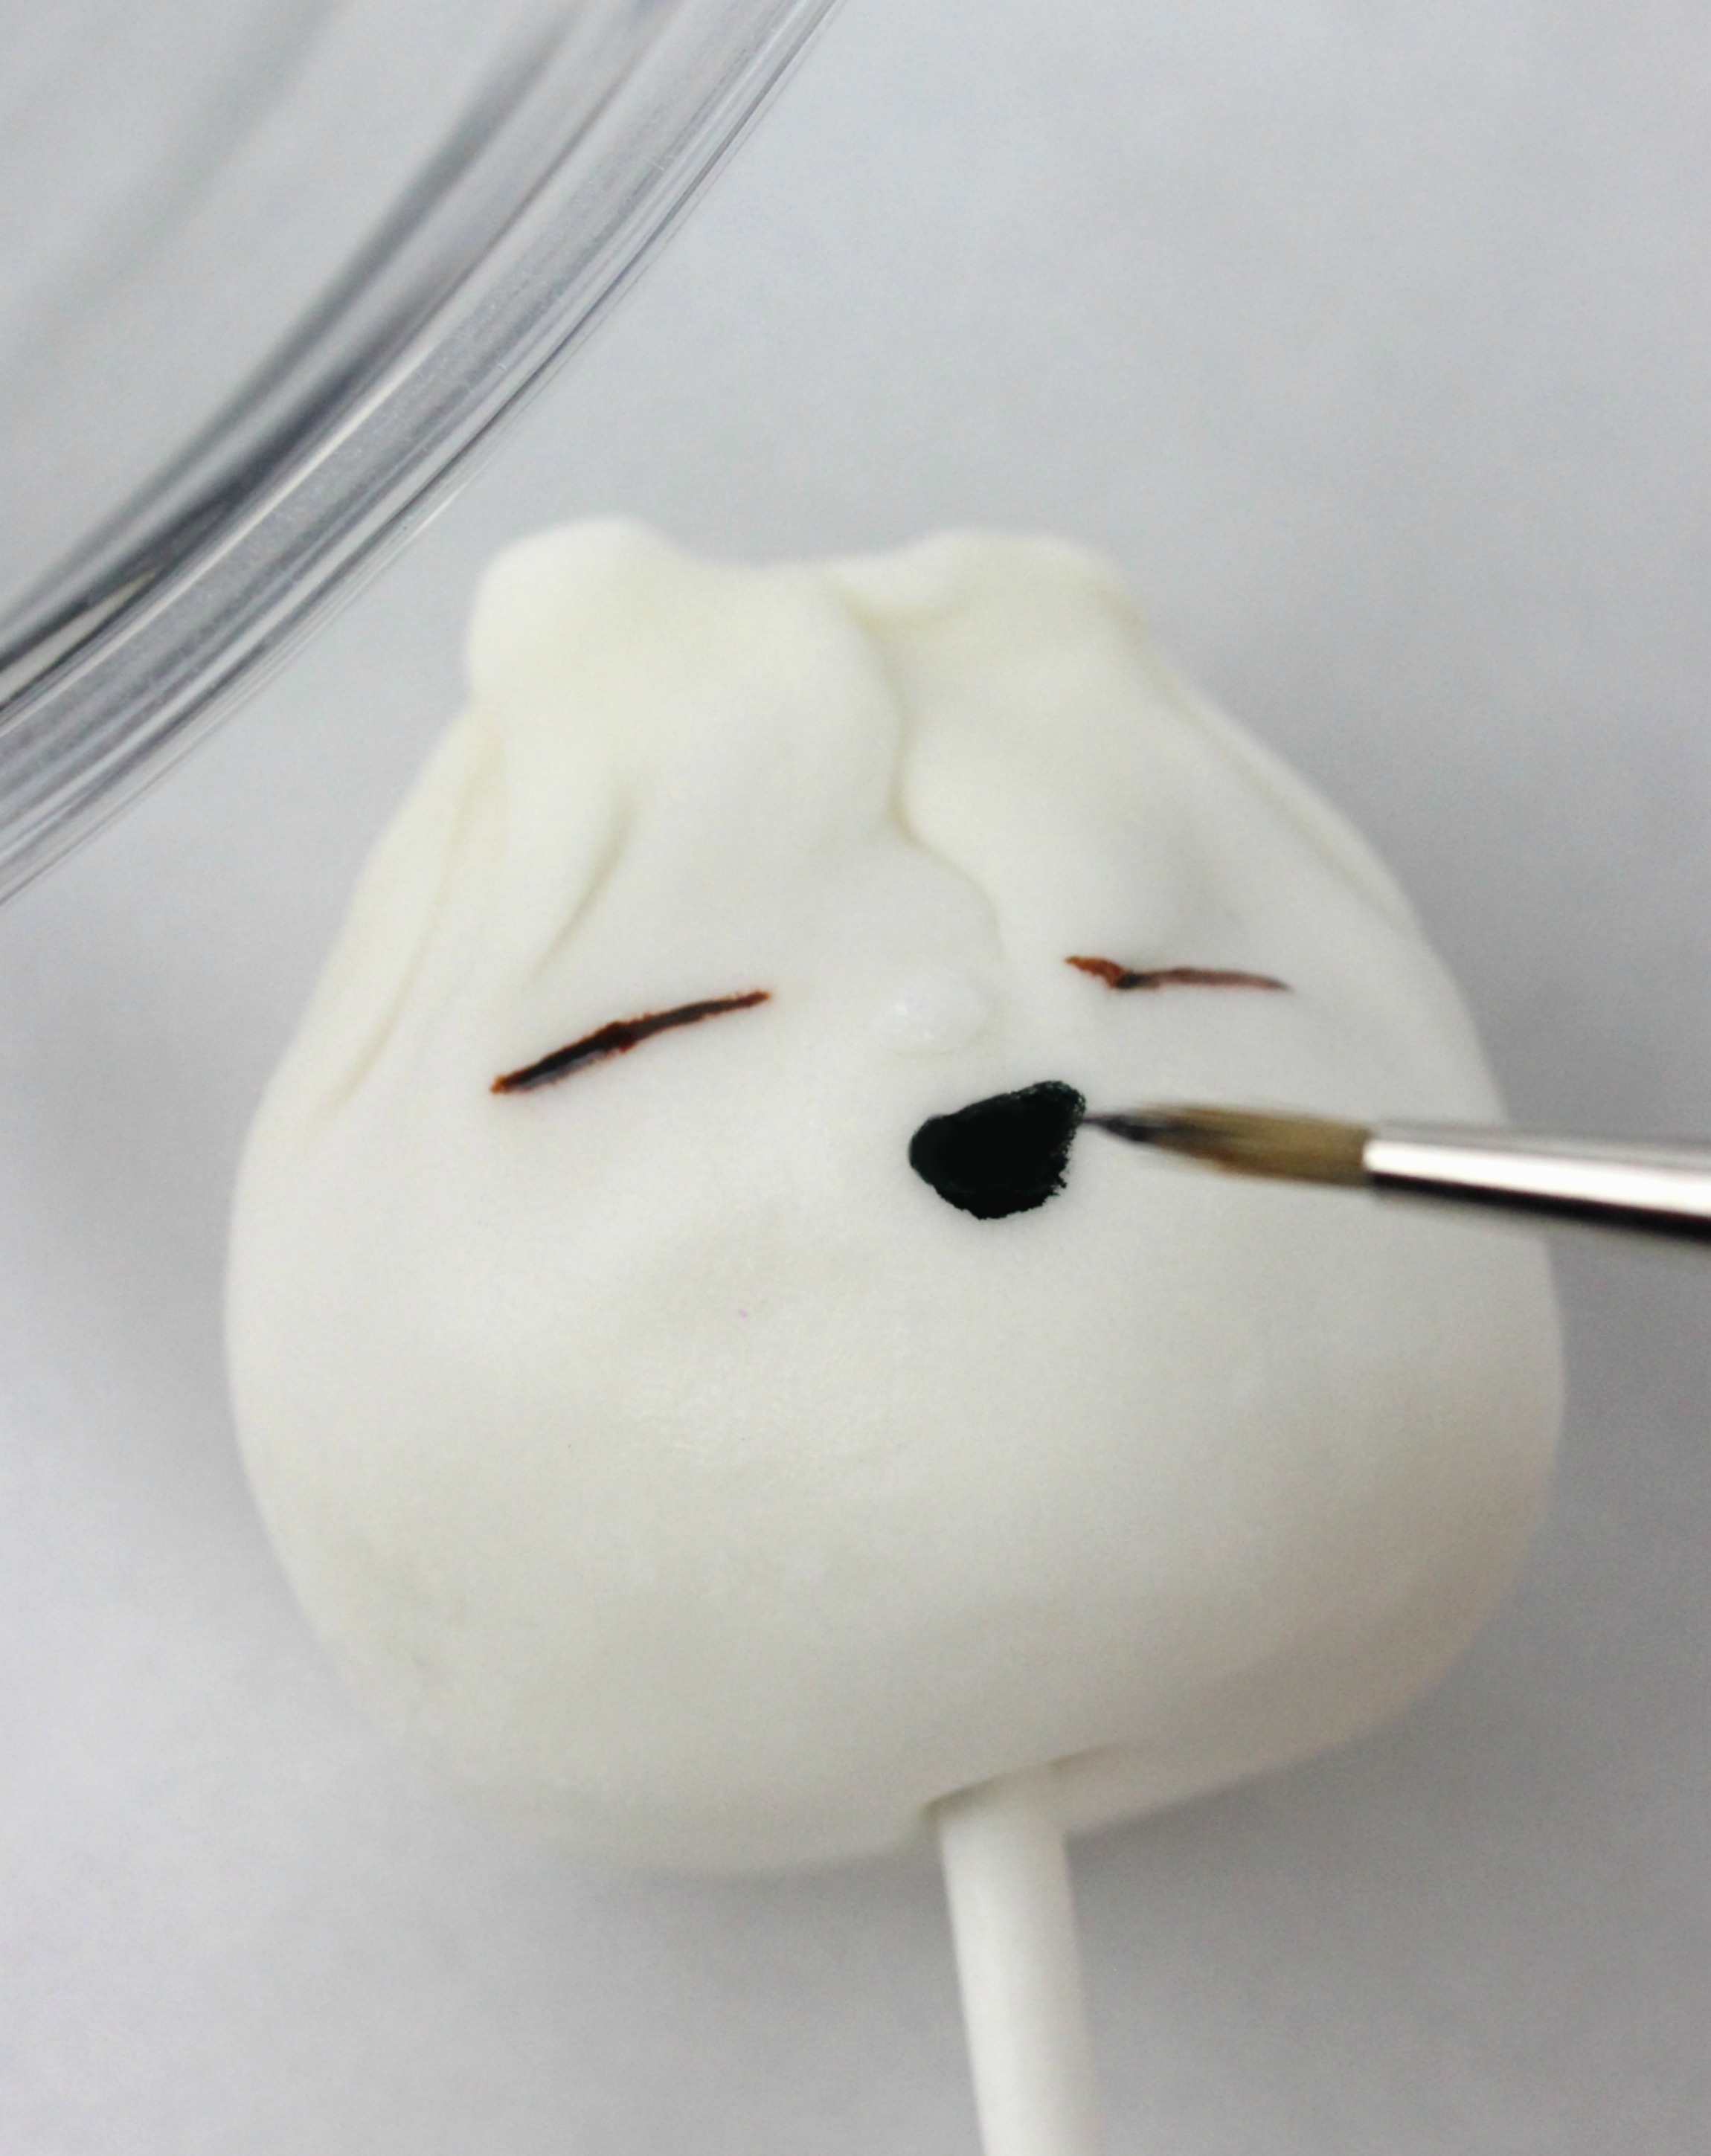
Step 6: Use a clean paintbrush to paint the eyes with brown food gel dye, then use black food gel dye to create the mouth.
Step 7: Pipe white icing to create the nose.
Step 8: Once the face details are dry, the cake pops are ready to serve.


2018 © Disney/Pixar