SCIM Provisioning
What is SCIM?
SCIM (or System for Cross-domain Identity Management) is a standard way for apps to manage user identities and accounts across different systems— making it easier to create, update, and delete user accounts, as well as manage attributes, groups, and roles.
It's commonly used in cloud-based and SaaS applications to automate and streamline user identity management, and vastly reduces manual efforts and ensures consistent access to different systems and resources.
Use Case
Let's say a company (your customer) uses multiple SaaS applications, such as email, project management, and customer relationship management (CRM) tools, and they want to streamline their user onboarding and off-boarding processes. They also want to ensure that user accounts, permissions, and group associations are consistent across all these applications to maintain security and access control.
By implementing SCIM in their identity and access management (IAM) solution (IdP), the company can create a centralized system for user identity management. When a new employee joins the company, their user account can be provisioned automatically across all relevant applications using SCIM's RESTful API, without manually creating accounts in each application separately. This saves time and reduces the risk of human error.
Similarly, when an employee leaves the company, changes roles, or joins a new group, their user account can be de-provisioned or updated centrally using SCIM, which automatically propagates the changes to all linked applications. This ensures that access to company resources is promptly revoked or updated, helping to maintain security and compliance.
SCIM with Frontegg
With Frontegg, you can let your customers leverage SCIM to manage their user identities on your app.
Via the Frontegg Admin Portal, your customers can set up their SCIM connection themselves and painlessly provision and de-provision user accounts, manage user attributes and roles, and synchronize user data between their IdP and your app.
This guide will show you how to:
- Enable SCIM provisioning for your customers
- Configure Provisioning Roles and Permissions
- Explain how your customers can set up SCIM connections.
Capabilities Supported by Frontegg
When Updating User Email on IdP side
When provisioning users via SCIM, note that if you update a user's email (on your IdP's side), It will create a new user on Frontegg's side (i.e., the user's new email won't be synced with the original user ID).
The following SCIM capabilities are supported by apps built with Frontegg:
- Provisioning of Users
- Updating User Details
- De-provisioning of Users
- Provisioning of Groups
- De-provisioning of Groups
- Updating Group Details
- Assigning Users to Groups
- Un-assigning Users from Groups
Enable SCIM provisioning for your customers
Go to your Admin Portal, and enable the SCIM Provisioning toggle, like so:
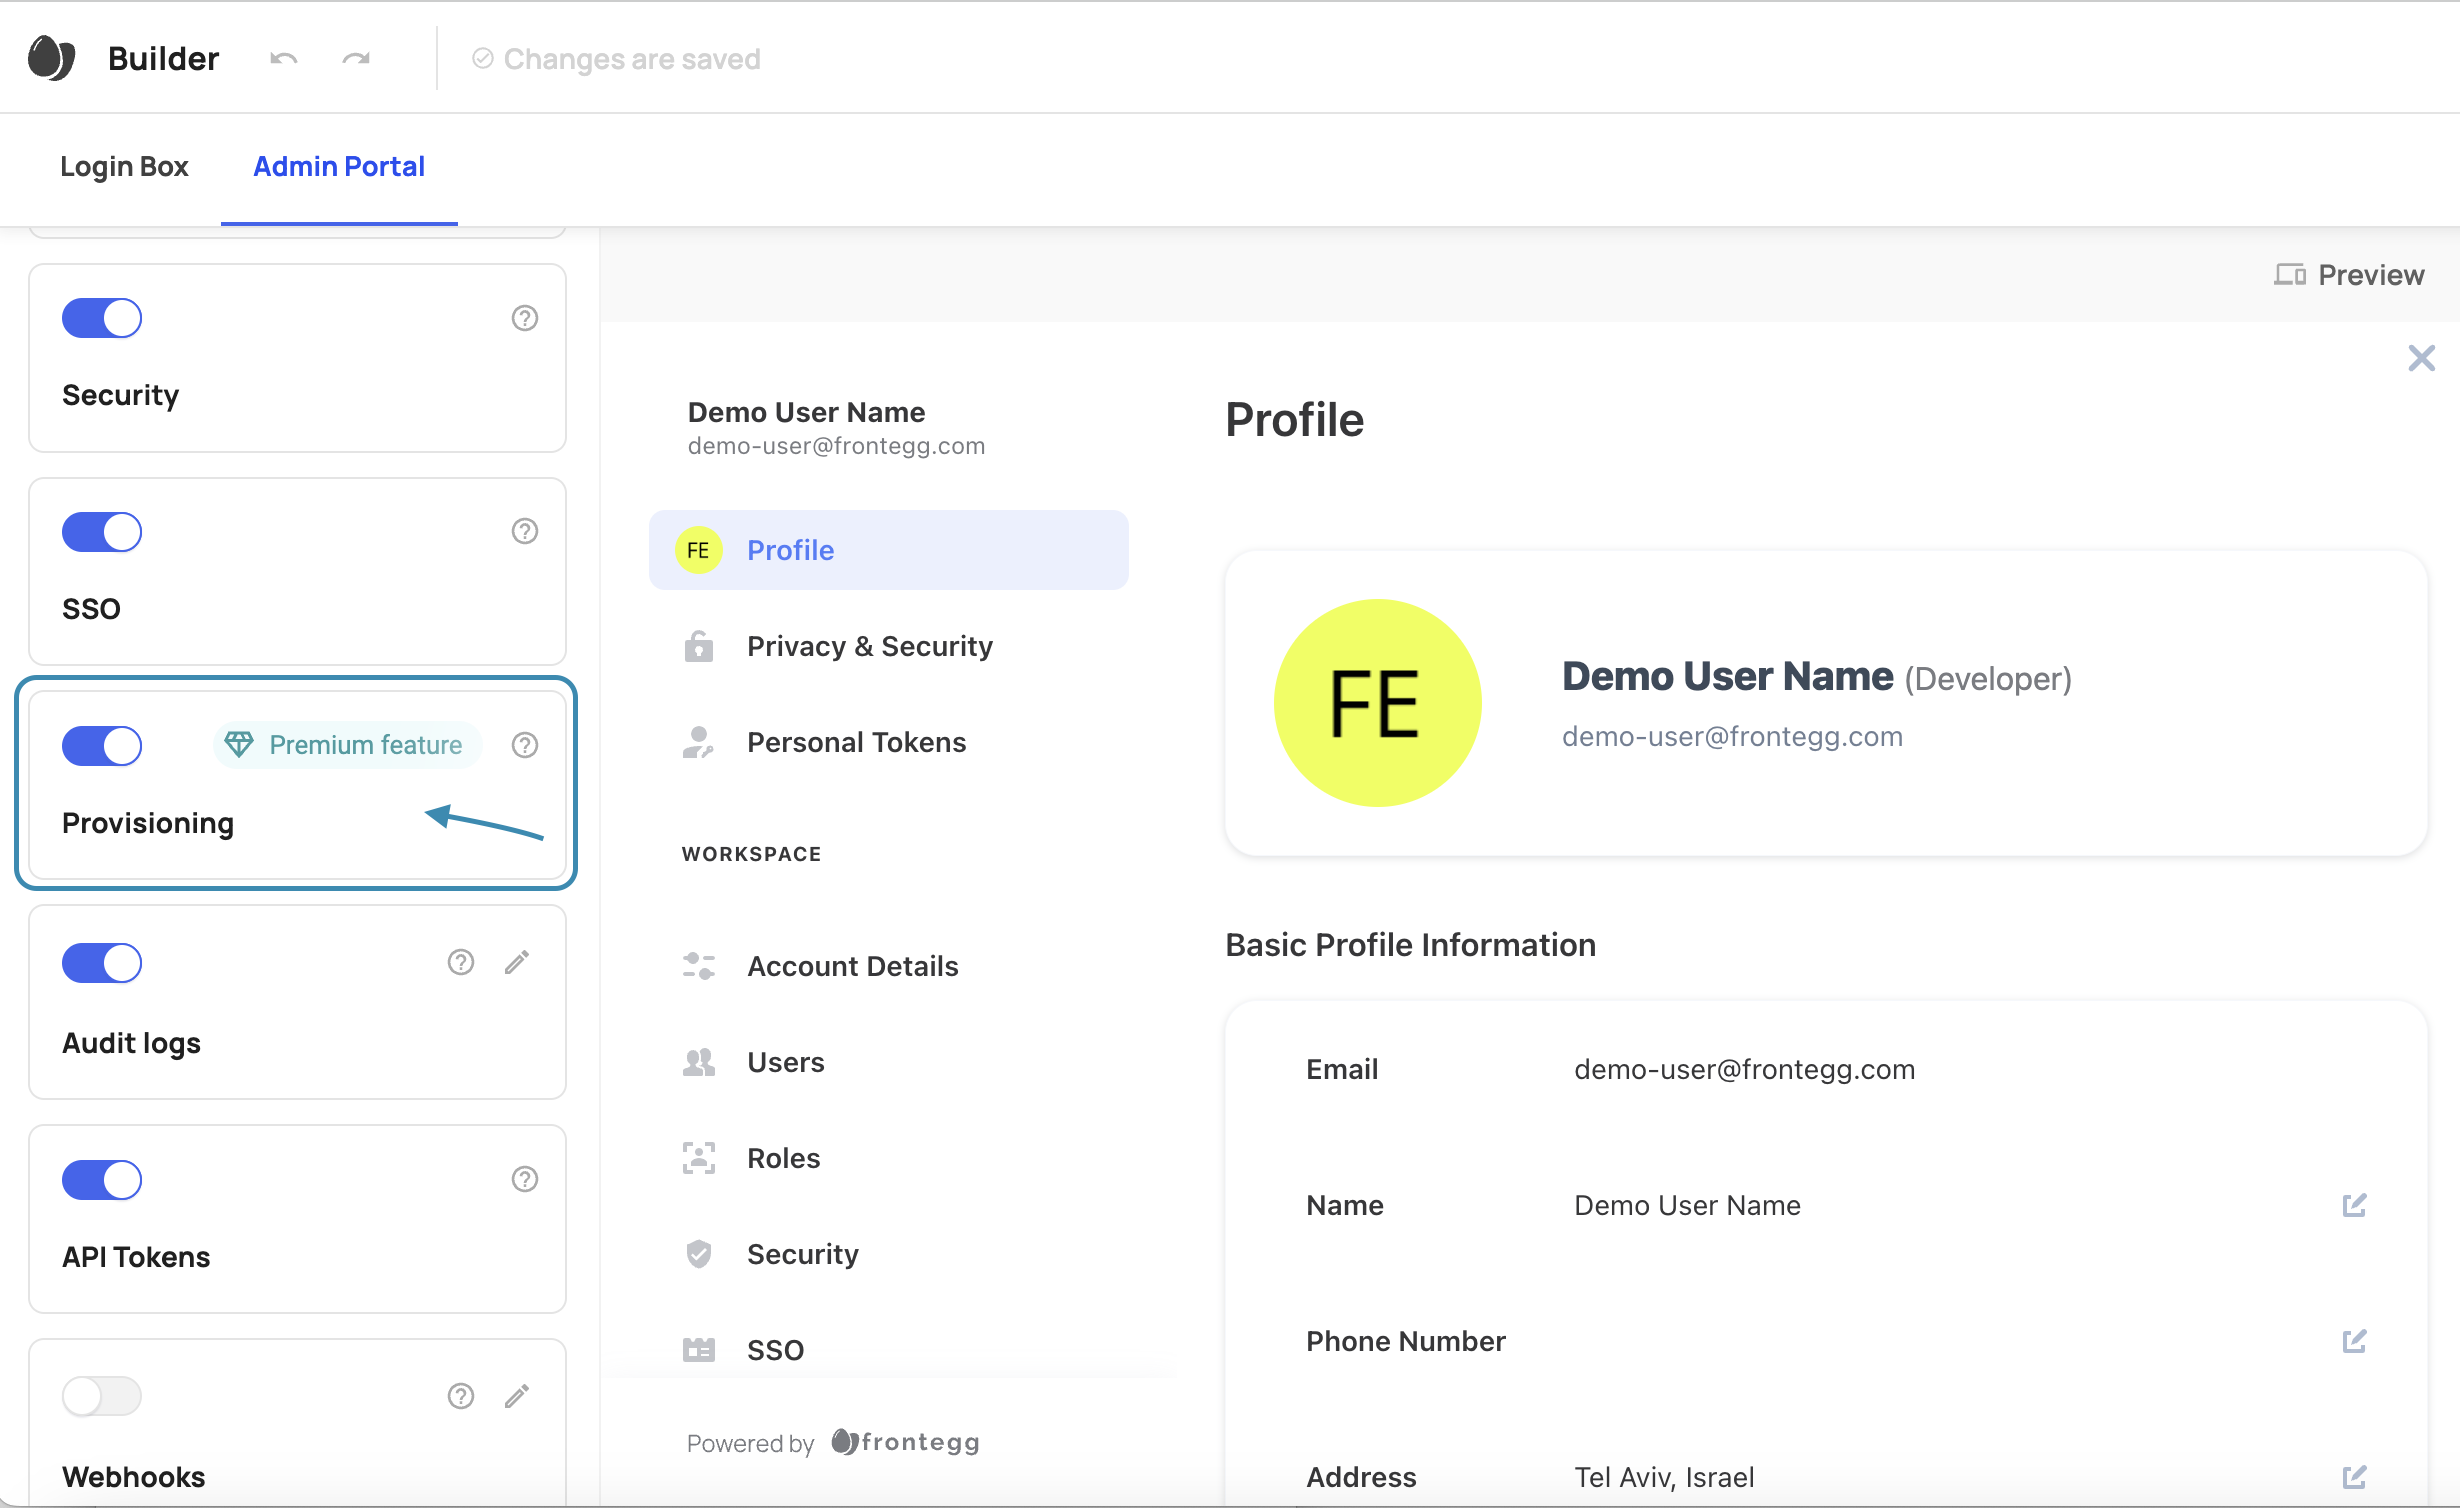
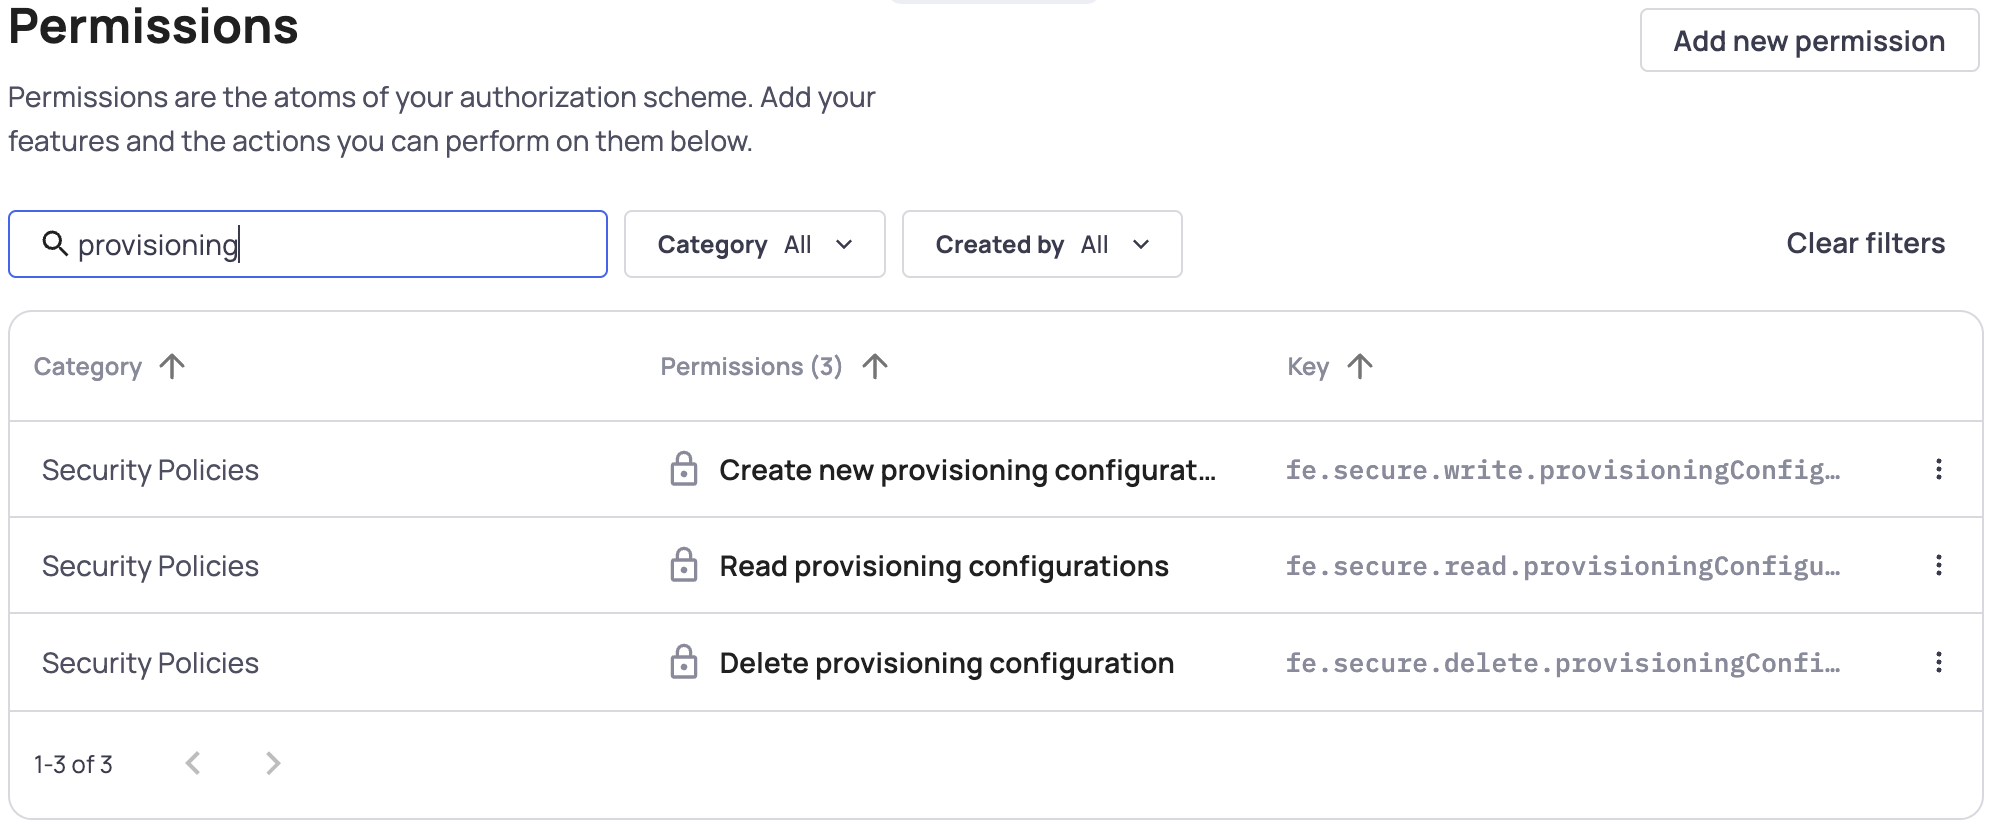
Configure Provisioning Roles and Permissions
Once you have set up provisioning in your Admin Portal, you'll have to decide which Roles should include permission to read, create, and delete provisioning configurations.
You can assign the relevant provisioning permissions to your roles. The 3 relevant permissions are:
- Create new provisioning configurations - Allows users with this role to create provisioning configurations
- Read provisioning configurations - Allows users to see the provisioning tab and see existing configurations
- Delete provisioning configurations - Allows users to delete existing configurations
Frontegg Recommends
The only users who need access to provisioning settings in the Admin Portal are those responsible for configuring and maintaining identity provider settings. We do not recommend granting provisioning permissions to users who do not need it.
Read more about Creating Roles.
Creating a connection from the Admin portal
Detailed walkthrough guides for Azure (Microsoft Entra) and Okta are available in the admin portal for specific Frontegg client-side SDK versions.
Prerequisites
For Frontegg SCIM walkthrough guides ensure your SDK version is updated:
@frontegg/[email protected]
@frontegg/[email protected]
@frontegg/[email protected]
@frontegg/[email protected]
@frontegg/[email protected]Earlier versions will only display the connection details.
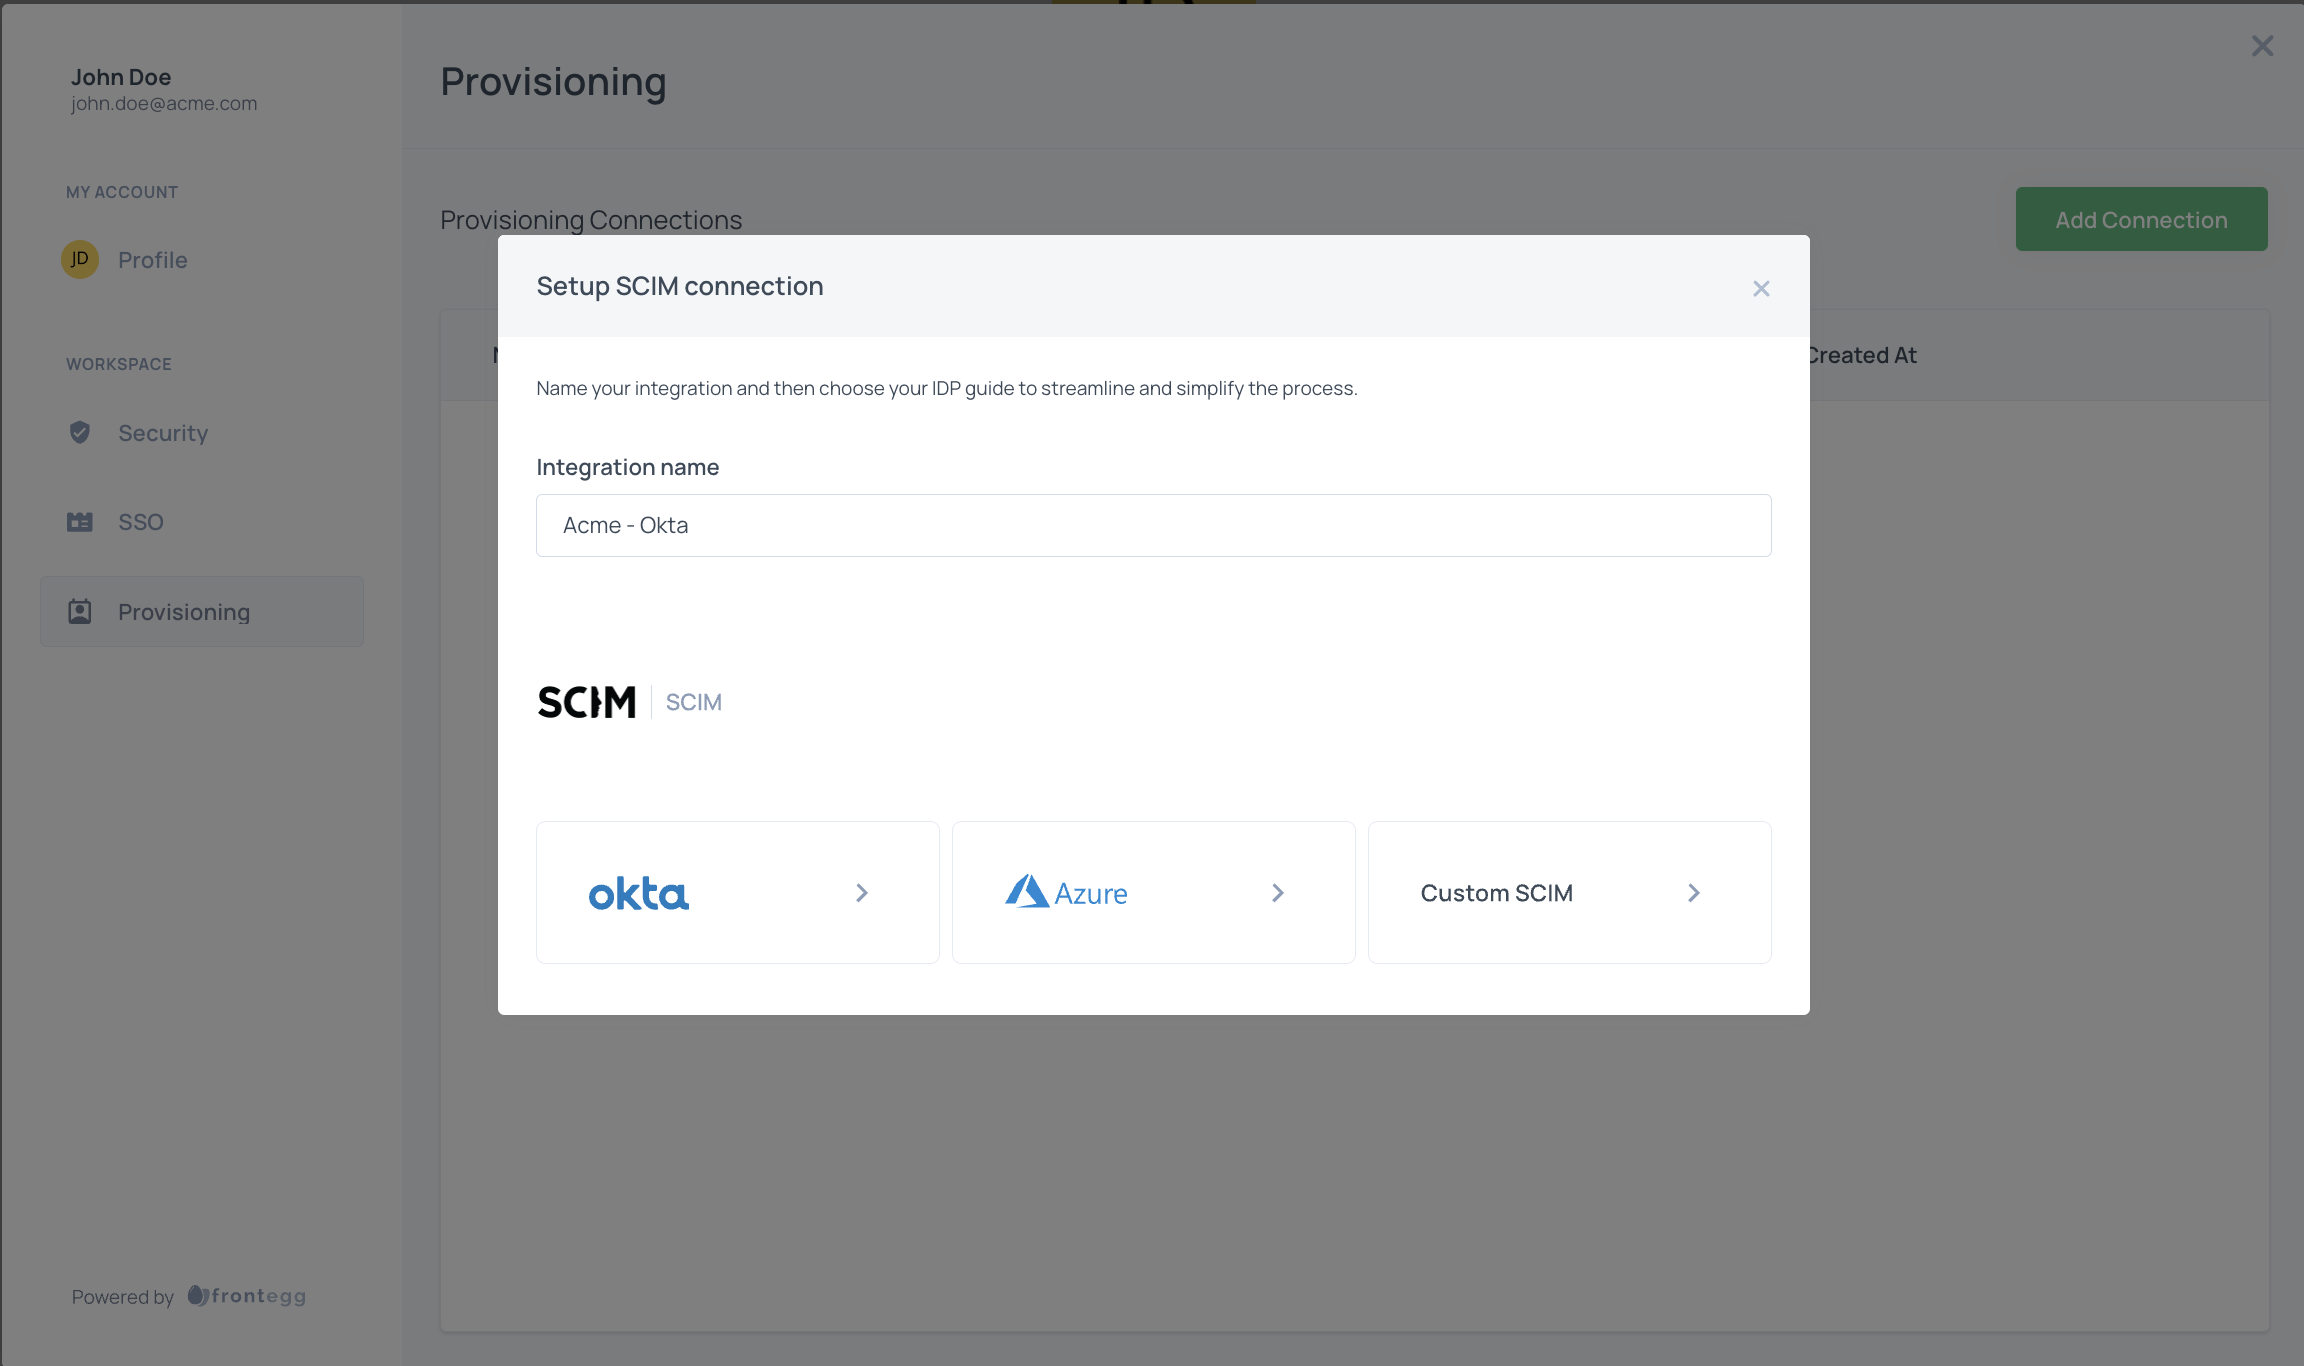
Creating a custom SCIM connection:
To start using SCIM, your customers should:
- Open the Admin Portal and click "Provisioning"
- Click "Add Connection"
- Enter a connection name, and choose Custom SCIM from the list
- Copy the Authorization token and the Provisioning URL into their Identity provider, SAML application, provisioning section
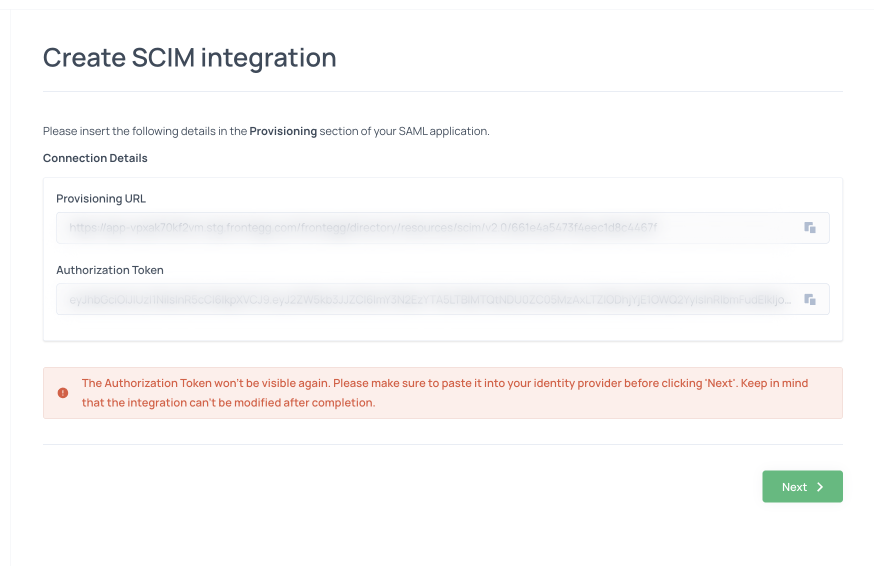
When your customer returns to your app, they should now see that they have a linked SCIM connection and that their account has started importing users from their identity provider.
Updated 3 months ago